Sunday, May 29, 2011

Monsters in the Backyard

PVC Support Cages-Bird Back 40
Eye popping. Astounding. Scary.

No -- I am not referring to the size of my stomach. Though that does need some work -- and is monsterish in a monster sort of way -- the monsters I am referring to are pictured to the right. This scary mass of growth is the Bird 2011 heirloom tomato garden barely five weeks after plant out.

Yes -- those are the famous Thomas Matkey PVC cages that have now been installed. This is just the first tier. The second tier will come in another few weeks. Setting this up -- this year at least -- was no easy task. The cages in front of you took the better part of two days to install.

And they are not installed as well as I would like.

Assembled Matkey PVC Cage Tier
In a "normal" tomato year (what year is really normal?) -- I lay the first tier construction over the plant -- mark off the holes with stakes -- remove the tier and pound PVC supports into the ground where the stakes have been placed. This usually makes for a fairly good fit -- although it never is quite "perfect." But -- PVC is forgiving. It bends. So -- if a post isn't exactly straight? You can bend it somewhat to where the first tier assembly will snap right on with no problems whatsoever.

But -- again -- this is a "normal" tomato year. This year has not been "normal" by any stretch of the imagination. Rain and hail have wiped out a couple of weekends that would normally be reserved for gardening purposes. Family issues -- such as cleaning out the house of my dear, departed father-in-law -- have claimed another couple of gardening days.

Lush 2011 Heirloom Tomato Garden
And so -- when I finally did find the time to start assembling the PVC supports -- I discovered (much to my chagrin) that every single plant had grown far to large and far to lush for me to place a tier assembly over the top of said plant. Any attempt to fit that square peg into a round hole resulted in (HORRORS!) broken branches -- bruised stems -- torn leaves -- blossoms knocked to the ground and early season production pounded into the ground.

Instead -- I was forced to adopt a tactic that I employed some two years ago when I again waited far too long to put the PVC cages on.

This little installation trick involves putting the entire cage together first -- attaching four 30-inch vertical supports to the assembled first tier (pictured above) -- and then hammering it into the ground from above. This is difficult as you need to drive all four PVC supports in at the same time -- all at the same level. One wrong "THWACK" with the rubber hammer can (and did) cause the assembled tier to suddenly break apart.

Pound! But Don't Break!
Extra care and attention must also be given to the entry points for each 30-inch PVC vertical. The tomato plants had grown so large and lush that many had grown right into one another. We don't want to be pounding stakes through branches, now do we? We also don't want to drive stakes through the drip irrigation sprinklers that are now buried under massive, lush tomato leaves and branches.

Dear neighbors: If you were wondering why I was using a flashlight to peer into tomato plants during the light of day -- now you know the reason why. It wasn't a sudden fit of insanity -- though that probably isn't far off.

Early Season Production: Green Zebra
And now? A bit of good news! All 24 PVC cages are now assembled and hammered into place. Despite the crummy May weather -- the rain and hail hasn't stunted growth nor has it led to the onset of disease (which is always possible when you're cramming tomato plants into a small space). Most plants are now three feet tall, with the exception of the Marianna's Peace, which is closer to four.

Installing PVC cages from above also means a close inspection of each plant, which revealed quite a bit of early season production. Nearly every plant has set at least two or three early season tomatoes. The early producers like Bloody Butcher, Tigerella, Stupice and Early Girl have set decidedly more.

The monsters are growing. Beware.

And now -- to answer a few questions:

How much to these PVC Cages Cost? Each cage costs $7 to $10. The most expensive pieces -- the PVC Cross -- sell for $1 each. Each cage requires four crosses. The top tier is constructed with PVC T's -- which are decidedly cheaper.

How strong are PVC Cages? I've never lost a single one. They hold up to strong winds, heavy crops, marauding cats, whatever Mother Nature can throw at them.

Are the PVC pieces glued together? No -- otherwise I'd never get them apart. They hold together quite well without glue.

How many years have you used this design? This is the fourth year of use for these cages. Not one piece has ever broken or so much as cracked.

What is the biggest drawback? If there is a drawback -- it's the time involved. Each piece must be cut to size. Putting each cage together also takes time.

How do you build these cages? Step-by-step instructions, with photos, can be found here.

Saturday, May 28, 2011

The Bag Man!

Marquitos and Celina Show Off the Flower Pouch
Bill Bird is the bag man -- and so is nephew Marquitos -- pictured here with his flower bag creation. It's rare when the new dog teaches an old dog some new tricks -- but that's exactly what happened this past weekend in the Bird Back 40.

I suppose a (short) explanation is needed.

I had never considered using bags to grow flowers or produce before until I spotted a photo of a bag in use some years ago while thumbing through one of the gazillions of gardening magazines we have strewn about the house (these things never get tossed -- they just get shoved into unused corners). This particular bag was covered with ripe strawberries -- and the particular advertisement was aimed at growers who had limited space.

I don't necessarily have limited space (though I am filling it up fast) -- but the thought of growing strawberries or flowers along the fence line did intrigue me.

Gaviota Strawberry Crowns
I have a lot of fence. My drip irrigation lines are already bolted to the fence. Possibilities abound.

Although the creators of the "Topsy Turvey" tomato creation offer a similar creation (strawberry grow bags) -- I wasn't about to blow $5 to $10 for just one bag. Bill Bird isn't just frugal. He's CHEAP! Ask the wife that is Venus -- and the rather ingenious plan to stick her diamond wedding ring in a box of Kentucky Fried Chicken (she didn't find it until she had consumed the mashed potatoes. Hey, priorities are priorities!).

Secondly -- I didn't want to plant the kind of strawberries that you find at your local nursery. Those are fine I suppose -- but I wanted something special. I wanted the varieties that you see in those one or two acre strawberry farms strewn across the Sacramento and San Joaquin Valleys. Know what I'm talking about? They are the plants that yield big, fat, juicy, lip-smacking strawberries that fresh fruit lovers dream about over the winter months.

Lip-Smacking Albion Strawberries
There's just one problem: Those varieties are "protected." Specifically developed by UC Davis, cultivars with legendary names like Chandler, Albion and Gaviota are NOT easy to find. The growers who maintain those one or two acre strawberry farms will be happy to sell you a flat of strawberries. But they stop short at selling a plant. I should know -- I tried -- and I failed -- MISERABLY.

Help would come in the form of a co-worker by the name of Nghia (Nee-Ah) Demovic (I call her DemoNvic because she takes great pleasure in making me look like a fool). Born in Saigon before the fall of Vietnam, Nghia immigrated to the United States when she was still a child. Despite the challenges that these children faced, Nghia easily transitioned from Eastern to Western Culture and is one of the top communications professionals working in California's State Capitol today.

But she also still has a firm command of the Vietnamese language -- which I put to good use. She could talk to the Vietnamese and Hmong farmers in ways that I could not. And -- in the space of an hour -- she managed to find what I could not discover over the space of six months: a source for the UC Cultivars.

Albion Strawberry Crowns Planted Beneath Apple Trees
I was like a kid at Christmas as I browsed through the Sakuma Brothers Strawberry Farm website. There they were -- the UC cultivars I had been looking for. And -- at a price of $5 or $6 for ten crowns (plants)? The price was right down Bill Bird's Alley of Cheapness. I couldn't order them fast enough.

As for the grow bags? Google is your friend. Once I started googling the terms of "grow bags" and "strawberries" and weeding through multiple advertisements for the Topsy Turvey strawberry bag and its inflated price -- I spotted something familiar. It was the bag that I had spotted in that gardening magazine years earlier.

The bag in question is called Original Al's Flower Pouch. And -- at a price of a buck a bag -- it was well within my price range. There are many outlets for the Flower Pouch, and some sellers will attempt to charge you more than a buck a bag, but keep looking. That's the nice thing about free market competition. Someone is always going to undercut the other guy.

Original Al's Flower Pouch-10 slots
Original Al's Flower Pouch contains anywhere from five, six or ten different slits or holes. These are very small. The first problem I would run into is, how do I fit that fat bundle of flower roots through that tiny hole? Should I fill the bag with dirt first and then plant? Or should I find a way to shove the plants into those tiny openings first -- then fill it with dirt?

The bag could not tell me. It was just a bag. Bags don't talk. And the bag did not come with instructions.

My first inclination was to rip the root ball of the petunia starter plants I'd purchased into two different pieces. But that wasn't easy. I nearly destroyed the first plant I tried this "trick" with. As a matter of fact, it's still trying to recover.

Petunia Starter Plants
It would take the advice of a seven-year old nephew to crack this nut. "Why not squeeze them," he asked in an innocent voice. I initially waved him off with a "no, that won't work" type of adult response when I discovered, to my horror, that he had already squeezed one root ball into the shape of a popsicle. I watched this boy -- in wonder -- as he slid that starter plant effortlessly inside that small hole. The base of the plant anchored itself to the outside of the bag, and the root ball, once inside, expanded to the point where it could not slip back out.

The kid is a genius.

In no time at all -- the kid who had all the answers managed to fill up all ten slots -- fill the flower pouch with dirt and hang it against a fence.

More Strawberries!
Venus and I would repeat the same kind of trick the next day with Albion Strawberry crowns. This was a bit trickier as we had to fill the bag half full with dirt first -- before planting the crowns -- then praying that they wouldn't fall out as we turned the bag up after planting and proceeded to fill it to the top with additional planter mix..

The crowns didn't move.

And so my good gardening friends -- there you have it. Bill & Venus Bird have graduated to "bag man" and "bag lady" status. There are eight more flower pouches to fill. What should we try next?

We are taking suggestions!

Saturday, May 21, 2011

(D)ILLIN!

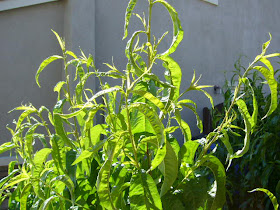
Dill Weed in a raised bed-Bird Back 40
I suppose I should have some really neato rap music with this post -- but while there are many descriptions for rap music -- "neato" isn't one of them. Besides -- rappers aren't singing about melons.

Well -- they are. But not the kind of melons that I have growing in the garden this year.

As the photo to the right will attest -- this has become rather common in the garden this year. I give you a surprise growth of DILL. As you can plainly tell from the photo -- it's growing like a WEED. Thus the name: Dill Weed.

Had some ingenious canner/gardener not discovered a perfect use for this weed in a jar of DILL PICKLES -- I sometimes wonder if it would be as appreciated as it is in the spice world.

Dill Flowers: A MUST HAVE for Dill Pickles
I didn't plant this by the way. Although I've harvested lots of dill seed from previous plantings -- I rarely need to plant it anymore. Like most weeds in the yard -- it just sort of springs up here and there (sort of like volunteer tomato plants that are popping up all over the yard at the moment). Unfortunately -- Venus and I have never been able to quite time out our dill harvest with our harvest cucumber pickles.

At this point in time -- May 21st, 2011 -- our cucumer plantings have barely unfurled a first true leaf. They're clearly "on their way," but we won't see true slicing or pickling cucumbers for another month or two. And by that time? The dill flowers that are popping open right now -- which would be the perfect addition to any jar of dill pickles -- will be a distant memory.

Freeze or Not to Freeze? That is the question
So -- what is a gardener who would die for a good dill pickle to do then? I've half a mind to start cutting off some of these flowers -- toss them into a sandwich bag and freeze them for later use. Then again, I'd rather use fresh -- not frozen -- dill during the canning process. When it comes to home-grown canning efforts -- I like everything that goes into that jar to come straight from the yard on that particular canning day.

I can't quite bring myself to cut it down yet either. A stalk of dill like this -- with dill flowers slowly unfurling -- is one of the prettiest spots in the entire Bird Back 40. Although it will feel like a crime to cut it out -- it's in one of the raised beds that is targeted for summer garden use later this weekend.

I'm not sure if it's age or gardening or both (or even cheap gin for that matter) -- but there's just nothing quite like the beauty of spring in a backyard garden. I notice and appreciate far more things now than I ever did in my younger years. It doesn't matter if it's bees happily buzzing about the garden -- or a growth of dill like this -- or perhaps that clump of California poppies that has emerged across the other side of the yard.

It all spells that magic word of spring. And -- thanks to a wife that has the absolute, most greenest thumb on God's Green Earth -- I get to enjoy a lot of scenes like this through the spring and summer months.

Yes -- it's just a weed. But it's also a sight to behold.

Sunday, May 8, 2011

Confessions of a North Natomas Cherry Grower

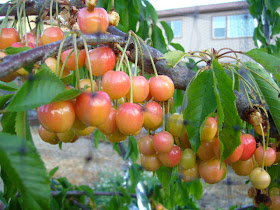
Royal Ranier Cherries-3rd Year Crop
Somewhere -- a bird is laughing.

And plotting...

See -- I know this bird. I know this bird intimately. I know this bird well enough to know that his name isn't Bill -- nor is it Venus. But this bird and I do have something in common.

We both love Royal Ranier Cherries. And we'll both go through extraordinary measures to get our dirty little claws on them.

This is one smart bird.

Have you ever grown cherries in your backyard? This is a first for me. Oh -- I've RAIDED cherry trees in other backyards sure enough. Childhood memories from Ribier Avenue in Modesto are ripe with memories of monster trees loaded with thousands of fat, ripe, red cherries.

Royal Ranier Cherries-Two Weeks From Harvest
It was a child's delight "back in the day" to hoist myself halfway up one of those monster trees -- make myself comfortable on a couple of branches and eat cherries to the point where I was litterally sick of them. At that point I would jump down -- walk home -- only to return the very next day and repeat the same steps I had taken the day before.

There were always enough cherries.

I bring up this memory because it seems as if the timeline for actually growing cherries works a little like this:

Year 1: Plant cherry tree
Year 2: Cherry produces 1st small crop
Year 20: Finally get to enjoy your first cherry because it's the one cherry that hasn't been consumed by marauding neighborhood birds.

You see -- I'm a battle with the birds here in North Natomas. It's the Bird against the birds. The prize is a 3rd year crop of lip-smacking Royal Ranier Cherries. And the Bird is losing -- miserably.

The Royal Ranier Cherry Tree-Third Year
The wife that is Venus and I first learned that we would be going to battle every May after we saw a small 2nd year crop of Royal Ranier Cherries vanish overnight. We had just each tasted our first cherry from that 2nd year tree. We both agreed -- as good as those cherries were -- they needed another "day or two" of seasoning in the sunshine.

The birds didn't wait for seasoning. The next day our small crop was gone. I actually watched with chagrin as a robin popped into the tree -- and popped out with the final cherry -- stem and all. The look he gave me that particular day said it all. You can describe it with one word: SUCKER!!!

I had never done battle with the birds over cherry crops all those years ago in Modesto because the trees were so large and lush -- they produced more than enough cherries for an army of boys and birds to consume. It didn't matter if they got the crop at the top. There was more than enough on the lower branches to enjoy.

But that was a 30-year old tree. 30-year old cherry trees produce massively larger crops than three year old cherry trees do. And I'm not about to wait another 27-years to enjoy my first Royal Ranier Cherry. Neither is Venus. We'll both be using walkers by then.

A way to get rid of marauding birds?
So what is an enterprising North Natomas cherry tree grower to do then? I am reminded of a gorgeous young lady that I met one day last spring at a Sacramento Certified Farmer's market. This eye-catching, blue-eyed,  blonde cherry temptress was pushing a huge and wide variety of cherries freshly harvested from the family farm somewhere near Stockton.

When I asked this young lady for advice regarding marauding birds and cherry crops, those blue eyes flashed as she related a now famous line from Nazi Major Toht from a memorable bar fight scene in Indiana Jones and the Raiders of the Lost Ark: "Shoot Zem, Shoot Zem All."

Nice advice, but somehow I don't think the Bird neighbors surrounding the Back 40 ranch would appreciate it much if I started blazing away with a shotgun. I'm already pushing the envelope with the Hello Kitty colony of bees. Besides, shotguns and suburbs don't make for a good mix.

Scare Tape on the Royal Ranier Cherry Tree
So what is a frustrated cherry grower to do then? As this photo clearly illustrates -- I took the advice of a Kern County gardener and blogger by the name of Maybelline. "Scare tape," she advised. "Scare tape will keep them away." Sure enough -- I found said Scare Tape at Peaceful Valley Farm Supply in Nevada City -- and thought my problem to be solved.

Just one teensy-eeensy problem. Scare tape might "scare" the birds in Kern County. But here in Sacramento? Bird laugh at scare tape. In fact, they love it. They land right next to it -- and look at without nary a hint of alarm. In fact -- some of that "scare tape" has found it's way into bird nests around the neighborhood.

How do I know this? When you see a bird's next glistening in the sun? You just know. Scare tape that I dutifully tied to cherry and plum trees plus a thornless boysenberry bush that is now in tatters from some bird shredding it into pieces is yet another good sign.

Precious the Cat: Not a fan of Scare Tape
The scare tape did work on one creature. It scared the bird-killer cat of mine into the next yard. That was about the only defense I had against marauding birds anyway, and now Precious the Cat has flown the coop.

The next line of defense? The next line of defense is netting that I purchased out of frustration last year when marauding birds helped themselves to half of the June Pride peach crop that year. Now -- I'm not THAT stingy. I don't mind sharing a fresh fruit meal with my feathered friends. But when the feathered friends started helping themselves to EVERY peach on the June Pride tree? That meant war.

I must admit -- the netting did work wonders when I placed it on the O'Henry Peach tree later that summer. The wife and I enjoyed a late season harvest of beautiful -- un-bird molested -- O'Henry peaches. But I didn't like the effect the netting had on the tree itself. Branches were bent in a downward motion -- and never did straighten out. The tree still doesn't look quite right from a late summer netting -- and this year's terrible bout of peach leaf curl isn't helping matters much either.

Still -- the scare tape was doing everything BUT scare the marauding birds eyeing the Royal Ranier Cherry crop -- so on the netting went this weekend.

Bird after the Bird Cherry crop!
The response has been less than desired. Despite my efforts to tie up every loose nook and cranny -- one bird in particular continues to find his way inside. In fact -- he takes great delight in chattering how much of a fool I am. If he isn't locating holes in the netting at the bottom of the tree -- he's ripping this hole that I tied off with string in the top.

I've caught this one particular bird inside this netting three times today alone. Each time I dutifully locate and close off the hole I've left open -- or the hole he's managed to create. But somehow I think I'm fighting a losing battle.

I've had a weekend to battle this bird. Tomorrow? It's back to work and back to the workplace.

Somewhere a bird is waiting...

And laughing...

Sunday, May 1, 2011

Snip, Snip, Snip!!!

Smile! It's SPRING!
Let the record show -- on this day -- May 1st, 2011 -- Mother Nature finally delivered the most beautiful, warm, wonderful spring day of the year. It's been a long time coming. Yesterday's windy conditions down here in the North Natomas riverbottom frustrated me to no end. But today? Today my friends -- as the photo will show -- today is a day for wide, colorful smiles.

Let the record show that -- on this date -- Bill & Venus Bird will fire up the Mantis Rototiller and get to work on amending the test bed for the 2011 corn, melon and squash crops. But it's a little early yet. The Mantis makes quite the racket. I'll let the nearby neighbors enjoy a bit more Sunday stillness before I intrude upon their Sunday quiet.

In the meantime -- big things are literally jumping out of the ground in the Bird Back 40. If you're a fan of home grown fruit? It's a sight to behold. The fruit tree trimming practices that Venus and I learned from City of Folsom Arborist Ken Menzer last year have been put into practice. The resulting yield has been quite surprising to witness.

He was right.

Flavor Finale Pluot Tree
There are two things from Ken's class that stick out in my mind. The first? "Fruit trees grow very fast," he instructed. That surprised me because it seems like I've been waiting eons for my backyard fruit crops to produce in the eye-popping numbers that I desire. The second? The second tip he delivered, which Venus and I have also put into practice, is to fertilize fruit trees on a monthly basis.

This doesn't mean you're required to get on your hands and knees with hoe in hand and scrape fertilizer into the soil around a base of a tree either. Nope -- his instruction was to take a small handful of fertilizer and just toss it under a tree once a month. In my case? I use a set of measuring cups that I keep in the garage. Each tree gets a 1/4 cup of fertilzer or less once a month without fail.

Pluots on the Flavor Finale Pluot Tree-Year 2
The advice that he delivered -- to prune every fruit tree branch after it has developed five leafsets -- plus fertilize monthly -- has produced some impressive results as you might be able to tell from the photo to your upper left. That, my friends, is the Flavor Finale Pluot tree that wifey and I planted during the 2010 bare root planting season. It had exactly three branches on it.

Today? A little over a year later? The Flavor Finale Pluot has about 30 branches. There is fruit all over the tree. It is growing like a weed -- as are the nectarine trees that we have planted out in the front yard -- in a small corner tucked against the home. The next door neighbor -- a retired farm-hand who worked peach groves all his life in Yuba and Sutter Counties -- warned me that "it would never work."

Today -- those trees -- also planted about one year ago -- trimmed and fertilized faithfully -- are approaching seven feet in height. Each of the three trees is loaded with nectarines. Unlike the peach trees planted in the Bird Back 40 -- which are suffering from a terrible bout of peach-leaf curl this year (Farmer Fred Hoffman has an excellent and informative posting on peach-leaf curl here) -- the nectarines are healthy and loaded with new branch growth. The neighbor -- who worked commercial farms for most of his adult life -- is quite fascinated with the growth show that is taking place and is considering his own patch of home-grown fruit.

Nectarine Trees-Frontyard Orchard Culture
See? This insanity cannot be cured.

Although the pluot is not part of a grouped Backyard Orchard Culture concept planting -- I am still treating it as if it is. This means trimming the tip off each branch after five leaf-sets have emerged. The Flavor Finale Pluot has reacted to this trimming party by growing at least two-to-three new branches from each branch that has been pruned. Once the new branches have unfurled to five or six leafsets -- they too are pruned back -- resulting in a tidal wave of branch growth.

I have already started the process of pruning the pluot for the first time in 2011. The new branches that emerged with the onset of a cold spring earlier this year have already unfurled to five or six leafsets. The trick to this pruning method is to prune at least three or four times per spring, summer and fall season. It's not hard -- but it does require an hour or so of time to locate all of the new growth and prune it back. Since the new growth is green and pliable -- it doesn't take much effort. You don't even need gardening shears. Fingers and fingernails work quite nicely.

New branch (left) emerging from trimmed branch (right)
I am not quite sure if the pruning or fertilizing routines are the reason behind this rapid and sudden growth. Like everyone else who prefers home grown fruit -- I can tell you that some trees are doing well and others not-so-well (see: peaches). But I can tell you that every tree that has been subjected to this trimming and fertilization effort has resulted in rapid, eye-popping growth. There's not a failure among the bunch.

So -- if you love it? WHACK IT! Remember? With each new branch that emerges during a summer of pruning? That's just one more branch that will result in a boatload of fresh fruit the following year.