Choppin' Broccoli

Tuesday, December 30, 2014

Dana Carvey Performs The Lady I Know
It is one of my most favorite skits from Saturday Night Live past. Comedian Dana Carvey performs the timeless classic of "The Lady I Know," otherwise known by its second and more popular name: Choppin' Broccoli. That skit -- which he still performs during his live shows -- is guaranteed to bring a bundle of laughs. Even though the song is nothing more than a repeat of the lines: "Choppin' Broccoli."

I guess it's the genius of Dana Carvey. See him perform his timeless classic -- with a full band behind him no less -- here on the Tonight Show with fellow SNL alum Jimmy Fallon.

Broccoli From the Bird Back 40
I'm reminded of this timeless classic every time I pull out a head of broccoli for one of our favorite meals or side dishes. This is broccoli season in California. You can find it for dirt cheap in most grocery stores -- and you can find it growing in the dirt that comprises the Bird Back 40. We're not just growing broccoli, the wife that is Venus and I have been gifted with the greatest of broccoli harvests in Bird Back 40 history. I've never grown broccoli like this before -- even though I've tried before (and failed somewhat miserably I might add).

So what am I doing different this year as compared to past years in the garden? Good question. I'm not really sure. Perhaps we just planted seeds and starter plants at the right time this year. Perhaps waiting until early spring to start our broccoli crops wasn't the best of ideas. Perhaps we should have started our broccoli growing efforts in the early fall -- as we did this year.

Bird Back 40 Broccoli Patch
I must admit -- I had my doubts. Although I did "cheat" somewhat this year and purchased a six pack of broccoli plant starters from Emigh's ACE Hardware in Carmichael -- Venus also scattered broccoli seed over a wide swath in one of the 4X8 gardening beds. The end result is we have about 10-15 broccoli plants that are sporting the best looking heads of broccoli I've ever seen. There's no bug damage on the crowns either -- which is another big plus.

The first doubts surfaced just after planting our starter plants in early October. Those small plants were immediately attacked by an invading horde of ravenously hungry slugs and snails. Spreading out some pet-safe slug and snail bait helped minimize the damage somewhat, but it wasn't totally foolproof. The leaves on the broccoli plants are peppered with slug and snail damaged holes. But those broccoli crowns -- that tasty meal we yearn for -- haven't been touched.

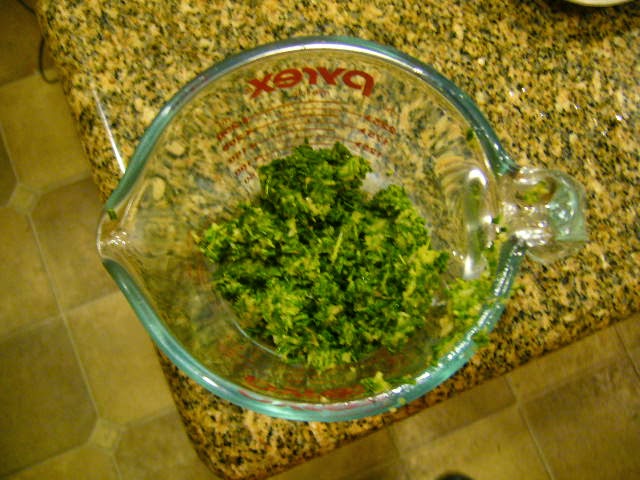
Freshly Harvested From the Bird Back 40
Why? I have no idea. I do not profess to be a Zen-Garden master. I only plant, irrigate, spread out some slug bait and wait. Whatever happens -- happens. I might also add that the gardening cat known as Lenny -- the wife's ultra spoiled Maine Coon furball of a cat -- also loved digging up those starter plants at the first opportunity. And you thought gardening was easy? Perish the thought. Between the slugs, snails and Lenny's incessant garden attacks, it's a wonder that any of the starter plants or plants grown from seed survived.

Broccoli was one of the first vegetables that I actually consumed as a child. Mom didn't grow it. She didn't buy it fresh either. Nope -- our broccoli in 1970's Modesto came from the blocks of frozen broccoli chunks that are still sold in stores today. That was an easy vegetable fix for a single mother of four children who had been forced into the world of full-time employment. At first -- as I recall -- I wouldn't touch the stuff. However -- when mother resorted to sprinkling this broccoli with processed lemon juice -- well, it was heaven at first bite. I couldn't get enough.

A New Wok for Christmas
It's been a long journey -- from frozen blocks of broccoli chunks to freshly grown broccoli from the backyard. I'll still douse the end result with lemon in some cases -- but I'm also partial to an herbed broccoli recipe that I stumbled across one day in one of the original Betty Crocker cookbooks (this is before Betty sold out to commercial interests). Broccoli Beef -- which we made just the other night from scratch using freshly harvested broccoli heads and grass-fed beef (flank steak) from Chaffin Family Orchards north of Oroville -- was a gastrointestinal delight to be sure.

Short and sweet? There are one million and one uses for broccoli. And given that we appear to have an unlimited supply in the Bird Back 40 (I am a tad concerned about how freezing temperatures will affect these plants) -- the end result will hopefully be a winter full of meals featuring freshly grown broccoli and other greens.

Which means I'll be chopping a lot of broccoli to the tune of "The Lady I Know."

Recipe for Herbed Broccoli:

Author's note: We always double, triple or even quadruple the amount of garlic in this recipe because, well, you can never get enough garlic in my humble opinion! We also double up on the spices.

1 lb. steamed broccoli
2 tablespoons olive oil
1 teaspoon dried basil leaves
1 teaspoon dried oregano leaves
1 teaspoon dried marjoram leaves
1/2 teaspoon salt (do not double)
2 cloves of garlic, crushed
2 Roma type tomatoes, chopped

Directions: Mix oil, herbs, salt, garlic and chopped tomatoes and set aside. Steam fresh broccoli on high heat for four minutes and remove to a serving dish immediately. Add tomato-herb mixture, mix well and enjoy!

Tastes Like Christmas!

Tuesday, December 16, 2014

Dancy Mandarins-Bird Back 40
That's the line I heard uttered from one of my co-workers earlier this month when I handed per a portion of a freshly harvested and just peeled Dancy Mandarin. Her eyes opened wide as she proclaimed: "Tastes like Christmas!" And you know what? She was right on the money. Because the Dancy Mandarin does indeed taste like Christmas. It's just one reason why the Dancy is known as the "Christmas Tangerine."

That's the old girl, pictured to the right. And when I say "old," I am being just a tad facetious. True -- the Dancy was the first tree I ever planted in the Bird Back 40. But that was way, way, way, way back in 2007. That's right. The Dancy Mandarin officially turns eight years old this month. I found it, tucked away, in a lonely Home Depot garden section corner. It was love at first sight.

Owari Satsuma Mandarin-Bird Back 40
We've added much more since then. Take -- for example -- this tasty mandarin offering to your immediate left. That, my friends, is the Owari Satsuma. It is "allegedly" the best tasting mandarin on the planet. That's what the commercial growers are selling at the moment at all the mandarin farms scattered about Placer and Sutter Counties. You can also find them in your local grocery stores -- but don't mistake them for "Cuties" (that's a different type of mandarin called Clementine).

The Owari Satsuma is in demand for a couple of different reasons. First, it's probably the sweetest mandarin to be found anywhere. Most citrus has a sweet and sour combination. But not the Owari Satsuma. It's just sweet. That's not a bad thing -- but if you like that sour punch in your citrus -- the Owari is not your cup of tea. Another reason why it's highly desired is that it's mostly seedless. Sure -- you're going to run across one of two them in each piece of fruit. But two is better than twenty -- if you're into the seedless type of citrus.

Murcott Mandarin-Bird Back 40
Another thing the Owari Satsuma has going for it is that it can take the knockout punch of sustained freezing weather and keep right on ticking. This isn't true for many types of citrus trees. But, as it turns out, the Owari Satsuma and the Dancy can handle that icy punch and not succumb to the elements. That's a plus, as I discovered last year, when Mister Snow Miser moved into the Bird Back 40 and set up an icicle factory for the masses.

Another citrus offering to be found in the Bird Back 40 is the Murcott Mandarin. While it isn't quite as cold resistant as the Owari Satsuma or the Dancy -- it offers one big advantage. The Murcott produces tasty, delicious, mostly seedless mandarins AFTER the Owari Satsuma and Dancy have played out. That's a big plus if you enjoy picking fresh citrus from the backyard offerings. And there's nothing I like more than stepping out into the yard in the morning and falling into a deep hole the dog has dug right next to the Murcott Mandarin tree.

Dancy Mandarin, Left-Owari Satsuma Mandarin, Right
Not that I've ever done that. Stupid dog.

For some odd reason, despite the drought, this is turning out to be a record year for citrus production in California. Some Owari Satsuma growers opened their roadside stands two weeks ahead of schedule. The trees are packed with fruit. The heavy rains we've received this month have also been a blessing in disguise, as my Dancy mandarins are packed with a juicy sweetness that's been missing in previous years.

Dancy mandarins are the original "Christmas tangerine." They are the fruit that mother packed into Christmas stockings for my brother and sisters a very long time ago. We didn't get this kind of treat often as we foraged for most of our fresh fruit and citrus. But tangerines were hard to come by and not at all cheap in the late 1960's-early 1970's. They didn't last long on Christmas morning. That much I can attest too.

Christmas Day Mimosas Anyone?
This is why I always make sure that the wife that is Venus always gets two or three Dancy mandarins packed into her stocking for Christmas Day. It's a tribute to my family of the past. And then, of course, we juice those plus another 100 of them for Christmas Day mimosas featuring Spanish Cava and freshly squeezed Dancy mandarin juice.

Hey! So I started our own Christmas tradition! Something wrong with that?

The Domek Family Chicken

Saturday, December 6, 2014

Domek Family Chicken Before Cooking
Now that you've finished off the last of those pesky Thanksgiving leftovers -- it's time to get back to some normal eating behavior, right? And, lucky for you, I've got a dish that is just about perfect for anytime of the year -- be it holidays or be it just a normal weekend.

There is no official name for this dish so I've taken the privilege of naming it the "Domek Family Chicken." I'll be honest with you. The "Domek" stands for a Sacramento gardener by the name of Andy Domek, whom I'm fortunate enough to work with at the State Capitol. Who says Democrats and Republicans can't get along? Andy's the Democrat. I'm the Republican. Which just goes to show that gardening blood may be thicker than political.

Rosemary Bush-Bird Back 40
We all agree on one point: This is one fine chicken. It's a beer can chicken type recipe -- but it's unlike any beer can chicken recipe I've run across before. I've also taken the advantage of modifying this recipe somewhat to add in some spices that are growing well -- perhaps too well I might add -- in the Bird Back 40.

That particular spice is featured above left. This is an "after" shot by the way. This was taken "after" I'd hacked this plant back to manageable proportions. It wasn't easy. It had grown across the sidewalk during an uncontrolled spring and summer growth spurt. Hacking it back took the better part of an afternoon. And while it looks rather sad right now -- don't be worried my friends. This plant will explode with new growth once next spring rolls around -- trust me.

Dried Rosemary Anyone?
How do I know this? Because this particular plant of the herb variety grows like a weed in the Sacramento area. By now you've probably guessed this "herb weed" is, in fact, rosemary. Half of North Natomas is landscaped with rosemary because it's so easy and cheap to grow. Its blue flowers yield tons of pollen for foraging bees. And rosemary with chicken goes together like vanilla ice cream and hot fudge sauce. The two were made for one another.

The Domek Family Chicken recipe didn't originally call for rosemary. But I'll tell you this much -- it was one fine addition. It added a spiciness and flavor that really made this a unique meal. Another addition was the garlic. Not because I wanted it. Garlic was an absolute requirement.

Rosemary
If you've ever worked with rosemary before -- especially fresh rosemary -- you've come to learn that this is one tough herb to chop up. The leaves of the rosemary plant are incredibly tough. How tough? I've placed rosemary leaves stripped from woody stems into a standard food processor, flipped that switch on high speed, waited for 30 seconds and then shut it off only to find out that the rosemary leaves were still intact. They're extraordinarily tough to shred into tiny pieces.

Yet -- tiny pieces is what I needed.

But I've learned a trick during the rosemary preparation process. Combine those tough rosemary leaves with seven or eight cloves of garlic in a food processor set on high speed and something wonderful happens. Those rosemary leaves suddenly give up the ghost and can be shredded into tiny bits and pieces. An added plus is shredded garlic that sticks to the rosemary like glue.

Chopped Rosemary and Garlic
Just what I needed.

Andy's directions were fairly specific. Once all of the spices were mixed together, you were required to spread it generously all over every inch of the chicken. This included shoving quite a bit of this seasoning mixture UNDER the skin. This is no easy task because if the skin breaks during this process, well, it's tough to keep this mix from falling off the chicken and onto the grates of the barbecue below. So, please, do be careful.

If you've never cooked chicken in a beer can setting, there are some things you'll want to watch out for. First -- you'll have to find some way to open and drain off all that beer. It's a terrible thing, but someone's got to do it. If you happen to have a lot of spare herbs thanks to a well established herb garden like we do -- the next step is to cram as many herbs into that beer can as possible. The final step is to fill it back up -- about halfway mind you -- with a nice white wine like chardonnay or sauvignon blanc.

Beer Can Chicken Roaster
If this means you have to open, and then finish, a bottle of wine -- well -- someone has to suffer. Might as well be you.

There are beer can chicken roasters that can be purchased at your local store like the one pictured, but I'll be honest, you don't really need one. It does make the transfer of the chicken to the can a little easier, but it's not absolutely necessary. To prepare the well-seasoned chicken for grilling, using Andy Domek's fine words of advice: "Place the cavity of the chicken over the beer can, tuck the wings behind the body and sit it up on the grill so it looks weirdly like it is lecturing you. Set your barbecue on low heat and roast for 60-70 minutes."

Another bit of added advice? Be armed with a well filled spray bottle and pay close attention to the chicken for at least the first 30 minutes as the barbecue will sometimes flare and we don't want to be setting our fine chicken friend on fire, now do we?

And now -- the recipe for Andy Domek's Famous Beer Can Chicken:

Andy Domek and a TURKEY???
1. Open a can of cheap beer (I personally am fond of the award winning beer out of Wisconsin -- Pabst Blue Ribbon).
2. Drink Pabst Blue Ribbon.
3. Shove some herbs inside the can -- I like a sprig or two of rosemary and fresh thyme. Fill can halfway back up with white wine.
4. Set aside.

Make a paste with:

1 tablespoon kosher salt.
½ tablespoon cinnamon
½ tablespoon ground ginger
½ tablespoon cumin
½ tablespoon turmeric
½ tablespoon coriander (optional—I like coriander so I add it)
1 teaspoon of black pepper
4-5 tablespoons of fresh rosemary leaves (dry is fine too)
4-5 cloves of garlic
2 tablespoons olive oil
Juice of one lemon or lime

Directions: Chop rosemary and garlic together in food processor until it reaches a fine paste. Add together with salts, spices, olive oil and the juice of one lemon or lime. Mix well. Coat chicken with mixture, loosening and lifting skin to place spice mix directly on chicken.


Roast for one hour.

Venus and The Duke

Sunday, November 2, 2014

Venus and The Duke Avocado Tree
Yeah, yeah, I know. It's not quite as snappy as "Bennie and The Jets," but give it a few years. Pretty soon it will just roll right off the tongue. Because Venus and The Duke are going to be telling their story for a very long time. At some point -- in the very near future I hope -- I will be posting photos of the fabulous guacamole that Venus will whip up from a very rare crop of Duke Avocados.

There's my fine lady to the right standing next to her favorite fruit-bearing tree in the Bird Back 40. It hasn't yielded a single fruit yet. But with avocado trees you need a little bit of luck and an awful lot of patience. I've come to learn a little of both following a near lifetime of killing avocado tree varieties right and left.

The Duke: October 2013
The Duke Avocado, which was barely two feet tall when I first planted it in it's permanent spot in a protected side yard exactly one year ago last October, laughed at the December frosts that coated the Bird Back 40 last year. While other citrus trees either gave up the ghost completely or died back by half, the Duke sailed through the freezing conditions with nary a scratch on it. In fact -- I'll make the point that it actually grew a full leaf set during last winter's colder than cold conditions. These conditions I might add, have doomed other avocado plantings in the past.

While I wouldn't consider myself the absolute authority on the Duke Avocado tree -- I have discovered a lot of information about it that is not contained in previous blog posts about this incredibly rare, freeze tolerant, avocado tree. Yes -- you're eyes did not fool you. This is one of the few tropical fruits that not only withstands sustained freezing conditions, it appears to prefer them. There is no other avocado variety on this planet, as far as I can tell, that offers this wonderful advantage. While most avocado varieties can be very touchy about climatic conditions, the Duke appears to be bullet and idiot proof.

Armstrong Nursery Catalog: 1929
This is a good thing -- as my idiot meter seems to spin out of control from time to time.

How do I know that the Duke is nearly bullet proof? From experience and lots and lots of research. The most recent discoveries about this ancient variety came only recently thanks to an inquisitive librarian by the name of Kelly Zackmann who toils for the public library system in the Southern California city of Ontario. This city was, at one time, home to one of the most groundbreaking and innovative nurseries in California: The Armstrong Nursery.

The nursery business closed up shop in 1970 following the death of founder John Armstrong, who lived to be nearly 100 years old. Although it continues today under the brand of Armstrong Garden Centers, with locations scattered about Southern California, there is no family connection anymore. And when the Armstrong family decided to finally sell the business following John Armstrong's passing, they had 70 years worth of records and other information that needed to be hauled away.

1929 Catalog Contains First Mention of The Duke
Thank goodness it didn't wind up in some landfill. Instead, it was donated to the City of Ontario public library system. The contents inside 80 boxes filled with horticultural history was carefully cataloged, stored and then largely forgotten. I knew about this history and where it was stored, but I figured out fairly early on that I wasn't going to make a special trip all the way to Ontario to dig through 80 boxes of Armstrong Nursery history. I'm nuts people -- but not that nuts.

Why the interest in old horticulture history? Because it was John Armstrong who saw the great promise that the Duke Avocado offered. It was Armstrong who would receive cuttings from the Mother Duke tree that grew from seed at the Sunnyslope Nursery located near Bangor in Butte County in 1924. It was Armstrong who attempted the very first grafting attempts of this unique tree. And it was Armstrong who, for decades, exclusively offered the Duke Avocado through his extensive and profitable catalog business.

1937 Armstrong Nursery Catalog
Short and simple? Without Armstrong's work, this avocado variety probably wouldn't exist. He saw its potential and for years he marketed the Duke Avocado as the ideal tree for planting in "cold interior districts." Although Armstrong would discontinue his catalog business at some point, he would continue to offer the tree on a wholesale basis to California nurseries up until 1971. That was right about the time the Armstrong family sold the business.

Meticulous research notes kept on the Duke tree from the late thirties and into the forties confirm that the tree, for some reason, does not bear well on the coast of California. However, the further inland it is planted, the better it does. The research tells the story of a ten year old Duke tree in Pomona that produced 3,000 fruits in one year. Groves of Duke trees in Arizona were reported to do even better.

Armstrong Nursery Research Notes on The Duke Avocado
Groves of Duke Avocado trees in Arizona? Yes, at one time they were grown there. Unfortunately, the passage of this thing called "time" tends to change the topography somewhat. The ranch where these groves once grew in abundance in Tucson, AZ was sold, subdivided and now contains nothing more than housing subdivisions. It happens to the best of us I suppose.

The Duke tree I have growing in the side yard of the Bird Back 40 grew five feet in one year. It is green, lush and very healthy. It now stands close to seven feet tall. According to further research notes obtained from Armstrong Nursery, Duke trees begin to bear fruit four or five years after planting. While I'm hopeful that my healthy Duke tree will begin to bear something next year, it probably isn't going to happen.

Venus and her Duke Avocado Tree
Patience, young man. Patience.

If you want to learn more about my quest to discover and grow a freeze tolerant avocado variety in North Natomas, I suppose it's best to start from the beginning. You can find followup reports here, here and even here.

Spooked Out!

Friday, October 31, 2014

Spooktacular Pumpkins!
Happy Halloween! I have a small confession to make. My name is Bill. I am 51 years old. And I'm really just a child at heart. I mean, really. While other 51 year old men are captains of industry or finding a cure for one disease or another -- I'm at home carving pumpkins. I'm hanging orange colored pumpkin lights outside. I'm preparing a scary music CD for the kids on Halloween night.

What sort of 51 year old man does this? You're right -- he doesn't. But 12-year olds do. I'm 12. Nice to meet you.

What in the World? A Smooth Pumpkin?
This isn't the first time we've grown pumpkins in the Bird Back 40. This isn't even our best crop of pumpkins. But this year's harvest does feature something special: a smooth skinned sporty looking Jack O' Lantern. What kind of pumpkin is it? Good question! I don't remember planting any seeds for a smooth-skinned variety to be completely honest with you.

The wife that is Venus and I normally plant two types of pumpkins. The small, sugary types that are reserved for all things pumpkin pie, pumpkin cookies, pumpkin breads and even pumpkin soups! We also plant seeds for a second, larger variety that will be used for carving purposes on All Hallowed's Eve.

2014 Partial Pumpkin Harvest: Bird Back 40
Yet -- for some strange reason -- the test bed gardening plot that we normally reserve for corn and all things pumpkins and other squash yielded three varieties of pumpkins. We did get a smattering of large, ribbed pumpkins sure enough. And then -- the test bed produced this orange smooth skinned wonder that is also streaked with shades of yellow. We've never seen anything like it before. We've never grown anything like it before. And -- strangely enough -- the garden produced only one of this variety.

Are ghostly spirits at work in the Bird Back 40? Quite possibly! But these are the good spirits who kept the nasty bugs away -- including the pesky squash bugs that have played havoc with past plantings. We saw only two this spring. Venus managed to bring them inside the house with some tomatoes she had recently harvested. We dispatched them rather quickly and haven't seen a trace of them or any brethren since. I didn't get around to spraying for them this year -- my back was in no shape for that kind of work. As it turns out -- bug spray wasn't needed. The squash bugs stayed away.

Not Quite Ready for Pumpkin Prime Time
I get a strange satisfaction over NOT paying for pumpkins to carve for Halloween. The one season where squash bugs invaded and destroyed most of our pumpkin crop, the wife and I were forced to head out to a pumpkin farm on a lonely Rio Linda street corner, where we shelled out $25 for three pumpkins.

I hung my head in shame that Halloween. Shameful! And, never again!

Last year was a record setting Halloween in terms of child visits to our GarageMahal. It brought back memories of my childhood, where THOUSANDS of brightly costumed Modesto children jammed
Grinning Jack O' Lantern
neighborhood streets, knocking on doors and taking delight in all the Halloween decorations that had been placed outside. It seemed that every home sported some sort of decoration back in the day.


The neighbors who served up our Halloween treats were fairly inventive themselves. If they weren't forcing us through some cardboard box, haunted house deathtrap in the backyard, they were doing something else to give us a proper scare. I remember one such gentleman (a father no less) who lived at a Codding Ave. house that featured a long hallway before it reached the front door.

Bird Back 40 Pumpkin (Weed) Patch
On this particular Halloween night when I pounded on his screen door (door bells were reserved for rich folks back in the day), there was no expected answer. The light in the house was low but I could make out a figure in a red-stained apron slowly coming down the hallway. As he slowly emerged into the light, I could hear the familiar cling-clang sound that is produced while sharpening razor-sharp knives. Sure enough, this man walking toward me had two butcher knives in his hand, and there was no doubt what he had in mind as he sharpened both utensils while slowly heading in my direction.

I did what every eight or nine year old boy would do in this situation. I did my best lear jet routine and ran like the wind! I could hear him laughing as I zoomed across his driveway, begging me to come back. And I would carefully and gingerly accept his candy offerings, while keeping a sharp eye on those sharp knives.

Home Grown Pumpkins
I know what you're thinking. "Big deal -- so he pulled a Jason routine from Friday The 13th." And you would be right. But you've got to remember something: This was 1971 in Modesto. There was no Jason. There was no Friday the 13th. There was no Freddie or Halloween slasher movie to pull inspiration from. The cult slasher movies were years away from release. Heck,  the scariest thing we had back in the day was Bob Wilkins and his "Creature Features" where he aired chilling horror films such as "Mars Needs Women." 

Not every neighbor took part in the fun. Some didn't do anything at all. But those who offered us no Halloween inspiration could expect to be properly egged. But not by me. Perish the thought.

When It Rains, It Blogs

Saturday, October 25, 2014

Black Cherry Tomatoes from the Bird Back 40
I really should be working. No -- really -- I should. It's a Saturday afternoon after a nice morning rainstorm and there's lots to do. I could plant garlic! I could pull weeds! I could clean the cat litter boxes! I could clean out the garage! So much to do. Instead, I blog.

No wonder the cats hate me.

There is one gardening project that I did take care of on this fine weekend day. See those nice cherry tomatoes in the top right corner? Those are Black Cherry tomatoes -- some of the best tasting cherry tomatoes I've ever had. And the thing is -- I didn't plant them this year. Like many tomato plants that spring to life in the spring -- the plant that produced these luscious Black Cherry tomatoes were "volunteers" in the Bird Back 40.

Saving Tomato Seed
I don't normally save tomato seed. I shove my plants so close together in the springtime that there's often a chance of cross-pollination. The tomato "experts" claim that cross-pollination among open-pollinated, heirloom tomato varieties is very rare, except I've seen it happen. And it's taken place right here in the Bird Back 40. Saving seed, therefore, simply isn't an option in my book.

But I made an exception with this particular tomato and if you're asking why, be patient, because I'll get to that in a moment. You see, this was one exceptional Black Cherry tomato plant. It produced golf ball sized cherry tomatoes in some cases -- bigger than most Black Cherry plants normally produce. That's a variety worth saving.

Black Cherry Volunteer Among Melon Vines
Secondly, this volunteer sprang to life in a raised gardening bed that had been reserved for melons, carrots, eggplants, bush beans, beets and a smattering of leftover pepper plants. In other words -- there was nary another tomato plant to be found in this bed. All of the other plants were on the other side of the Bird Back 40, reducing the chances of cross-pollination.

Finally, I'm almost positive that this plant sprang from a cherry tomato that I had put into this raised bed a year earlier. I'll be honest with you. The plant I put into the ground last year was nothing to write home about. It caught some sort of funky disease not long after plant out. And while the disease didn't kill it, it did severely limit production and what came off the vine wasn't all that good to be brutally honest.

Black Cherry Tomatoes Ready for Seed Saving
This is one of the challenges that heirloom growers face. Sometimes you get good tomato. Sometimes you don't. This Black Cherry tomato plant wasn't all that great. However, it was planted next to another heirloom variety that churned out buckets of large tomatoes -- one of my best producers last year. Figure that one out. I still haven't figured out why some plants do well -- while others planted two feet away perform horribly.

When I noticed this Black Cherry plant volunteer growing among the many melon seeds I planted -- I resisted the urge to tear it out. I didn't really spot it until I noticed the first ripened offerings to be honest. And they were pretty darn large and pretty darn good in my opinion. Secondly, the volunteer plant was prolific with production. Why tear out a good thing that Mother Nature rewarded you with? To put it short and sweet, you don't. You roll with what Mother Nature gives you.

Fermenting Tomato Seeds in a Windowsill
It's while I was cleaning out this particular bed last weekend did I first notice the golf ball sized offerings it had produced. I've never seen Black Cherry tomatoes so large before. So, I borrowed a page from the Father of the Modern Tomato, Alexander Livingston. He would often spot what he called "sports" in his tomato plantings. It's from these "sports" where he saved and gathered seed. This is how Livingston helped create the tomato as a major food source. Before Livingston's time, tomato plants were considered to be "ornamentals." They were to be admired as flowers and nothing more.

The process of saving seed to be used next year isn't all that difficult. It's a little messy -- but also a lot of fun. You simply cut the tomatoes open -- squeeze that tomato juice, pulp and seed into a plastic cup and top it off with two to three tablespoons of water. I also cover my cup with plastic and make sure to poke holes in the top so it can breathe. The most important part of the process is placing it in a spot where the cat won't fuck with it.

Bacterial Growth After Fermentation Process
I have many cats who like to fuck with things. It's what cats do. That's why my cup of tomato goop and seeds went on a windowsill in the office that I keep closed off to the cats. There's no temptation there if they can't see it, and the cats choose to chase marauding mockingbirds instead.

This process, by the way, is called fermentation. It's an important part of the saving seed process because the fermentation acts to remove diseases and other problems that can destroy tomato seeds. After five or six days in a windowsill, your cup of tomato goop will be covered with a fine layer of bacterial growth.

Good Seeds Sink to Bottom
Yeah -- it looks like Hell but it's the result you're looking for. After five or six days, you're ready for the next step. Simply remove the bacterial goop that's formed at the top of the cup with a spoon and fill the cup with a little more water. The good seeds that you'll want to save will sink to the bottom and stay there. I like to pour off bits of water because it gets the leftover tomato goop out before the seeds can spill out. After four or five rinses, you have clean tomato seed at the bottom of your cup. Better yet -- there's no more tomato goop.

After pouring off the rest of the water, while using a fat finger to stop the seeds from spilling out, place your freshly cleaned and fermented seeds on a paper plate or better yet -- a paper towel. Spread them out -- separating each seed if possible (easier said than done). Place your paper plate or paper towel containing seeds in a room or a place where marauding cats can't get to it, and in a week to ten days you have tomato seed for the following spring.

Black Cherry Seeds for Next Year's Garden
It means next year's tomato garden WILL have a Black Cherry tomato plant. Better yet -- you can also trade seed with other growers and try out new varieties.

There's a strange satisfaction that comes from saving your own tomato seed. I can't explain it. I can only tell you that it's there. There's a strange sort of pride that develops when you witness the seeds that you saved from the previous year suddenly spring to life the next spring. I can't put my finger on it, except to tell you that it does exist.

I suppose it's another one of those guilty pleasures derived from gardening. Whatever it is, I like it.

Dig, Child, Dig!

Monday, October 20, 2014

F.C. Joyce Elementary School: Photo Courtesy of Eli Bob
Dig, Child, Dig! Dig until it hurts! And then dig just a little bit more. I can still remember my mother's commands -- even after all of these years. For -- the love and joy that is digging in the dirt is not easily learned nor taken up by children right away. That is why I was fortunate enough to have a mother who pressed a gardening trowel in my hand one day, point to a particularly weedy and particularly dry gardening bed and utter the following one word command: DIG!

It was not a request. Nor was it a very good idea to tell my mother that I had better things to do, which I clearly thought I did. Little did I know that it would be on this day where my love for all things gardening would be born and nourished. This is where the education started: In a small patch of dirt in a somewhat barren and neglected corner of a single-family tract home built for returning World War II veterans on Ribier Avenue in the somewhat isolated San Joaquin Valley city of Modesto, CA.

Filling a Raised Garden Bed: F.C. Joyce Elementary School
I am approached often by many different sorts of people -- some local and some not -- who request that I post this note or that. Sometimes the causes are worthy and do deserve some mention -- but not on a blog about vegetable gardening in the Bird Back 40. And then there are some offers -- well -- where I can't say "thank you, but I'm not interested" quite fast enough. Not a week goes by when two or three people write to inquire about this or that. Most of the time -- I'm sorry to say -- the answer is no. This blog is about vegetable gardening. This blog is about my experience. It is about the wife that is Venus. This is my muse.

Consider this blog post an exception. I'm not sure why. Perhaps the pitch was too good. Perhaps it brought back memories of home. Whatever it was -- it worked. Today's story, children, is about children. Not just any children -- but a particularly hard-working group of children in North Highlands. These children attend F.C. Joyce Elementary School on Watt Avenue in North Highlands. More importantly, given the choice of playing tetherball or starting a garden -- these children chose work over play.

Raised Gardening Beds: F.C. Joyce Elementary School
The raised bed garden creation work that took place this past weekend on the campus of F.C. Joyce Elementary was the brainchild of an organization called Healthy Planet USA, a non-profit that works to provide gardens in schools for children and integrate hands-on learning experiences in the classroom. That is the language that Healthy Planet USA gave to me to repeat to you. What does "integrate hands-on learning experiences" mean?

It means these fine folks taught these kids a thing or two about digging in the dirt. They pressed a gardening trowel into the hands of those students, as my mother once did to me, and gave the following instructions: DIG.

Dig the children of F.C. Joyce Elementary did.

Photos Courtesy of Eli Bob
It's the photos that tell the true story of what took place one afternoon on the campus of this school located in North Highlands. Volunteers replaced some forlorn looking bushes with six raised beds, but that's just the start from what I understand. Once the kids get started and develop the passion for gardening that is sure to follow -- as many as 25 raised gardening beds could be in place soon.

So what's this all about? What is really going on here: Well -- I think Healthy Planet puts it best in their own words: "The Healthy Planet model is based not only on improving food awareness, academic outcomes, and entrepreneurship, but also community development and empowerment. As a result our Healthy Growing School Gardens are financed by the community and local business partners, (aka School Champions) through crowdfunding."

A Garden Grows Here
They continue: "School gardens achieve similar outcomes; bringing communities together, building a sense of pride, ownership, and empowerment along the way. The communities help fund, build and sustain their school gardens. And the children in our Healthy Growing programs benefit the greater community. This often overlooked ‘community development’ component is essential to ensuring that a school garden is successful for many years."

Not many people garden anymore. They don't have the time. They don't have the desire. They work too hard or family obligations take up far too much time. Although vegetable gardening has made a bit of a comeback in recent years, there was once a time when EVERY household on any particular block contained a garden. That simply isn't true anymore. I don't know if it will ever be true again.

But I do know this much. Pressing a gardening trowel into the hands of an impressionable young boy or girl, or letting them move gardening mix from one area to another, isn't necessarily such a bad thing. Because this is where it starts. This is where the education begins.

And that's not a terrible thing if you ask me.

Bill's Note: California schools looking to join the gardening movement are in luck. Schools can register easily through the Healthy Planet USA website. Once a school is registered there is a “site visit” where staff can visit the school and assess what is needed to make a garden happen. Any school can get involved whether they are public, private, have a garden or not.