Showing posts with label Recipe. Show all posts

Choppin' Broccoli

Tuesday, December 30, 2014

Dana Carvey Performs The Lady I Know
It is one of my most favorite skits from Saturday Night Live past. Comedian Dana Carvey performs the timeless classic of "The Lady I Know," otherwise known by its second and more popular name: Choppin' Broccoli. That skit -- which he still performs during his live shows -- is guaranteed to bring a bundle of laughs. Even though the song is nothing more than a repeat of the lines: "Choppin' Broccoli."

I guess it's the genius of Dana Carvey. See him perform his timeless classic -- with a full band behind him no less -- here on the Tonight Show with fellow SNL alum Jimmy Fallon.

Broccoli From the Bird Back 40
I'm reminded of this timeless classic every time I pull out a head of broccoli for one of our favorite meals or side dishes. This is broccoli season in California. You can find it for dirt cheap in most grocery stores -- and you can find it growing in the dirt that comprises the Bird Back 40. We're not just growing broccoli, the wife that is Venus and I have been gifted with the greatest of broccoli harvests in Bird Back 40 history. I've never grown broccoli like this before -- even though I've tried before (and failed somewhat miserably I might add).

So what am I doing different this year as compared to past years in the garden? Good question. I'm not really sure. Perhaps we just planted seeds and starter plants at the right time this year. Perhaps waiting until early spring to start our broccoli crops wasn't the best of ideas. Perhaps we should have started our broccoli growing efforts in the early fall -- as we did this year.

Bird Back 40 Broccoli Patch
I must admit -- I had my doubts. Although I did "cheat" somewhat this year and purchased a six pack of broccoli plant starters from Emigh's ACE Hardware in Carmichael -- Venus also scattered broccoli seed over a wide swath in one of the 4X8 gardening beds. The end result is we have about 10-15 broccoli plants that are sporting the best looking heads of broccoli I've ever seen. There's no bug damage on the crowns either -- which is another big plus.

The first doubts surfaced just after planting our starter plants in early October. Those small plants were immediately attacked by an invading horde of ravenously hungry slugs and snails. Spreading out some pet-safe slug and snail bait helped minimize the damage somewhat, but it wasn't totally foolproof. The leaves on the broccoli plants are peppered with slug and snail damaged holes. But those broccoli crowns -- that tasty meal we yearn for -- haven't been touched.

Freshly Harvested From the Bird Back 40
Why? I have no idea. I do not profess to be a Zen-Garden master. I only plant, irrigate, spread out some slug bait and wait. Whatever happens -- happens. I might also add that the gardening cat known as Lenny -- the wife's ultra spoiled Maine Coon furball of a cat -- also loved digging up those starter plants at the first opportunity. And you thought gardening was easy? Perish the thought. Between the slugs, snails and Lenny's incessant garden attacks, it's a wonder that any of the starter plants or plants grown from seed survived.

Broccoli was one of the first vegetables that I actually consumed as a child. Mom didn't grow it. She didn't buy it fresh either. Nope -- our broccoli in 1970's Modesto came from the blocks of frozen broccoli chunks that are still sold in stores today. That was an easy vegetable fix for a single mother of four children who had been forced into the world of full-time employment. At first -- as I recall -- I wouldn't touch the stuff. However -- when mother resorted to sprinkling this broccoli with processed lemon juice -- well, it was heaven at first bite. I couldn't get enough.

A New Wok for Christmas
It's been a long journey -- from frozen blocks of broccoli chunks to freshly grown broccoli from the backyard. I'll still douse the end result with lemon in some cases -- but I'm also partial to an herbed broccoli recipe that I stumbled across one day in one of the original Betty Crocker cookbooks (this is before Betty sold out to commercial interests). Broccoli Beef -- which we made just the other night from scratch using freshly harvested broccoli heads and grass-fed beef (flank steak) from Chaffin Family Orchards north of Oroville -- was a gastrointestinal delight to be sure.

Short and sweet? There are one million and one uses for broccoli. And given that we appear to have an unlimited supply in the Bird Back 40 (I am a tad concerned about how freezing temperatures will affect these plants) -- the end result will hopefully be a winter full of meals featuring freshly grown broccoli and other greens.

Which means I'll be chopping a lot of broccoli to the tune of "The Lady I Know."

Recipe for Herbed Broccoli:

Author's note: We always double, triple or even quadruple the amount of garlic in this recipe because, well, you can never get enough garlic in my humble opinion! We also double up on the spices.

1 lb. steamed broccoli
2 tablespoons olive oil
1 teaspoon dried basil leaves
1 teaspoon dried oregano leaves
1 teaspoon dried marjoram leaves
1/2 teaspoon salt (do not double)
2 cloves of garlic, crushed
2 Roma type tomatoes, chopped

Directions: Mix oil, herbs, salt, garlic and chopped tomatoes and set aside. Steam fresh broccoli on high heat for four minutes and remove to a serving dish immediately. Add tomato-herb mixture, mix well and enjoy!

The Domek Family Chicken

Saturday, December 6, 2014

Domek Family Chicken Before Cooking
Now that you've finished off the last of those pesky Thanksgiving leftovers -- it's time to get back to some normal eating behavior, right? And, lucky for you, I've got a dish that is just about perfect for anytime of the year -- be it holidays or be it just a normal weekend.

There is no official name for this dish so I've taken the privilege of naming it the "Domek Family Chicken." I'll be honest with you. The "Domek" stands for a Sacramento gardener by the name of Andy Domek, whom I'm fortunate enough to work with at the State Capitol. Who says Democrats and Republicans can't get along? Andy's the Democrat. I'm the Republican. Which just goes to show that gardening blood may be thicker than political.

Rosemary Bush-Bird Back 40
We all agree on one point: This is one fine chicken. It's a beer can chicken type recipe -- but it's unlike any beer can chicken recipe I've run across before. I've also taken the advantage of modifying this recipe somewhat to add in some spices that are growing well -- perhaps too well I might add -- in the Bird Back 40.

That particular spice is featured above left. This is an "after" shot by the way. This was taken "after" I'd hacked this plant back to manageable proportions. It wasn't easy. It had grown across the sidewalk during an uncontrolled spring and summer growth spurt. Hacking it back took the better part of an afternoon. And while it looks rather sad right now -- don't be worried my friends. This plant will explode with new growth once next spring rolls around -- trust me.

Dried Rosemary Anyone?
How do I know this? Because this particular plant of the herb variety grows like a weed in the Sacramento area. By now you've probably guessed this "herb weed" is, in fact, rosemary. Half of North Natomas is landscaped with rosemary because it's so easy and cheap to grow. Its blue flowers yield tons of pollen for foraging bees. And rosemary with chicken goes together like vanilla ice cream and hot fudge sauce. The two were made for one another.

The Domek Family Chicken recipe didn't originally call for rosemary. But I'll tell you this much -- it was one fine addition. It added a spiciness and flavor that really made this a unique meal. Another addition was the garlic. Not because I wanted it. Garlic was an absolute requirement.

Rosemary
If you've ever worked with rosemary before -- especially fresh rosemary -- you've come to learn that this is one tough herb to chop up. The leaves of the rosemary plant are incredibly tough. How tough? I've placed rosemary leaves stripped from woody stems into a standard food processor, flipped that switch on high speed, waited for 30 seconds and then shut it off only to find out that the rosemary leaves were still intact. They're extraordinarily tough to shred into tiny pieces.

Yet -- tiny pieces is what I needed.

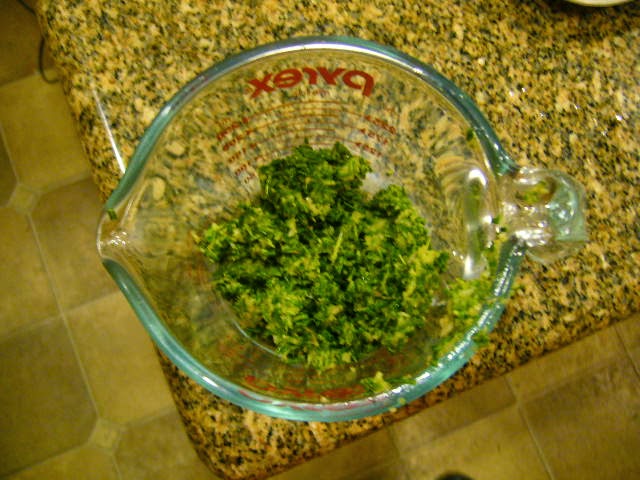
But I've learned a trick during the rosemary preparation process. Combine those tough rosemary leaves with seven or eight cloves of garlic in a food processor set on high speed and something wonderful happens. Those rosemary leaves suddenly give up the ghost and can be shredded into tiny bits and pieces. An added plus is shredded garlic that sticks to the rosemary like glue.

Chopped Rosemary and Garlic
Just what I needed.

Andy's directions were fairly specific. Once all of the spices were mixed together, you were required to spread it generously all over every inch of the chicken. This included shoving quite a bit of this seasoning mixture UNDER the skin. This is no easy task because if the skin breaks during this process, well, it's tough to keep this mix from falling off the chicken and onto the grates of the barbecue below. So, please, do be careful.

If you've never cooked chicken in a beer can setting, there are some things you'll want to watch out for. First -- you'll have to find some way to open and drain off all that beer. It's a terrible thing, but someone's got to do it. If you happen to have a lot of spare herbs thanks to a well established herb garden like we do -- the next step is to cram as many herbs into that beer can as possible. The final step is to fill it back up -- about halfway mind you -- with a nice white wine like chardonnay or sauvignon blanc.

Beer Can Chicken Roaster
If this means you have to open, and then finish, a bottle of wine -- well -- someone has to suffer. Might as well be you.

There are beer can chicken roasters that can be purchased at your local store like the one pictured, but I'll be honest, you don't really need one. It does make the transfer of the chicken to the can a little easier, but it's not absolutely necessary. To prepare the well-seasoned chicken for grilling, using Andy Domek's fine words of advice: "Place the cavity of the chicken over the beer can, tuck the wings behind the body and sit it up on the grill so it looks weirdly like it is lecturing you. Set your barbecue on low heat and roast for 60-70 minutes."

Another bit of added advice? Be armed with a well filled spray bottle and pay close attention to the chicken for at least the first 30 minutes as the barbecue will sometimes flare and we don't want to be setting our fine chicken friend on fire, now do we?

And now -- the recipe for Andy Domek's Famous Beer Can Chicken:

Andy Domek and a TURKEY???
1. Open a can of cheap beer (I personally am fond of the award winning beer out of Wisconsin -- Pabst Blue Ribbon).
2. Drink Pabst Blue Ribbon.
3. Shove some herbs inside the can -- I like a sprig or two of rosemary and fresh thyme. Fill can halfway back up with white wine.
4. Set aside.

Make a paste with:

1 tablespoon kosher salt.
½ tablespoon cinnamon
½ tablespoon ground ginger
½ tablespoon cumin
½ tablespoon turmeric
½ tablespoon coriander (optional—I like coriander so I add it)
1 teaspoon of black pepper
4-5 tablespoons of fresh rosemary leaves (dry is fine too)
4-5 cloves of garlic
2 tablespoons olive oil
Juice of one lemon or lime

Directions: Chop rosemary and garlic together in food processor until it reaches a fine paste. Add together with salts, spices, olive oil and the juice of one lemon or lime. Mix well. Coat chicken with mixture, loosening and lifting skin to place spice mix directly on chicken.


Roast for one hour.

Garden Leftovers, Meal Memories

Friday, October 17, 2014

Garden Fresh Sweet Bell Peppers
It's that special time of year when the summer garden, which I've nearly torn out and replaced with fall greens, yields a surprise tasty treat or two. This is especially true with the three varieties of eggplant that Venus grew from seed last winter. We were blessed with purple, white and yellow eggplants all summer long.

As I picked the last of this tasty treat plus a smattering of still-sweet and crunchy red and green garden peppers, a thought crossed my mind. I had the makings of one of the best Thai dishes I've ever had the pleasure of tasting. And it was that singular thought that brought on the memories of Tom Hudson and our famous lunches of scrumptious Thai dishes.

Tom Hudson
I had the good fortune of working with Tom while serving in the Office of Senator Rico Oller, who represented the 1st Senate District in California. One of the largest and most rural of districts, we had a lot of territory to cover. A lot of it was old gold rush territory -- where I would come to discover an ancient and massive pear tree that was and still is very productive. But that's another story for another day.

Tom was a jovial fellow -- easy to get along with -- very intelligent and as I would come to learn, we shared a common passion for all things Thai food. We also had something else in common: famous appetites. And on those days when we left the office on Friday for a nice lunch somewhere downtown, we always gravitated in the direction of our favorite Thai restaurant.

Gai Pad Prig Khing
Not only did we share a love for all things Thai food -- on those days we both professed a desire for the same dish: Gai Pad Prig Khing. Translated? That's a mix of green beans, bell peppers and a spicy chili paste that was to DIE for. We could chow down on that delicacy all day long and never get tired of it. A condemned inmate on Death Row had a better shot at redemption than any bowl of Gai Pad Prig Khing set down in front of Tom and I.

Ah -- but it was more than just a special dish, you understand. It also had to be prepared a special way. There are three particular versions of spicy Thai dishes: Medium heat, hot and THAI HOT. Thai hot dishes were normally reserved for people of southeast asian descent. It was deemed to be too hot for us white guys -- or so the waitress believed. But as we insisted on unlimited amounts of THAI HOT Pad Prig Khing, our pretty Vietnamese server opened her eyes so wide that her eyeballs nearly popped from their sockets.

Garden Fresh Eggplant from the Bird Back 40
As she ran to the kitchen, chattering in her native language about these two crazy, rotund white guys who were insisting upon a dish prepared in the traditional Thai hot method, both the owner and the cook leaned out to take a look. They smiled. They waved. They knew us from previous visits. They knew exactly what we wanted. And they would deliver a dish of Gai Pad Prig Khing that was so hot, it burst into flames the moment anyone dared touch it.

There was nary a green bean or sliver of sweet pepper left when we were finally finished. While Gai Pad Prik Khing wasn't the only dish that we would order -- it was clearly our favorite and it was always prepared in our special way.

Pad Prig Khing Prepared at Home
Time has a way of passing. Life changes. Tom would leave the Capitol some years later for a better opportunity at the Board of Equalization. I would switch over to another legislative office after Rico's term in office ended thanks to term limits. The Thai restaurant that we frequented would later close. Times change. People move on. But I never forgot those memories.

Not too long ago I stumbled across a recipe for this dish from a blogger who not only visited Thailand frequently, but had married a man of Thai descent. The recipe, which you can find here appeared to be an exact copy of the dish that Tom and I had enjoyed all those years ago. Not only that -- but this recipe contained the secret of how to make this dish just the way Tom and I liked it: THAI HOT.

A Late Season Garden Treat: Eggplant
I was not disappointed. Not only was the recipe an exact duplicate of what Tom and I enjoyed, I could make it better with fresher ingredients. I could play around with the seasonings, reduce the sugar or increase the amount of red curry or thai hot peppers. In short, I could make it better than any restaurant -- and I had fresh summer vegetables from the backyard to boot.

This is a meal that even Tom Hudson would approve of.

Please visit Sherri's Thai-Foodie blog here. It's filled with incredible recipes -- food that is so good that you'll never feel the need to step into a Thai restaurant again. Simply put, you can make it better in your own kitchen. And that's all that counts.

Soup's On!

Sunday, October 14, 2012

Fresh Garden Veg-All!
As our summer days begin that ever so slow slide into that cooler interim we call "fall," it's time to take stock of what's left in the summer garden, and what's done. Although some heirloom tomato patches are still churning out fruit, our heirloom plantings pretty much petered out a solid month ago. While we still enjoy the occasional tomato or two, the bushel harvests are a distant memory.

I'm sad to see those days end. I'm never ready for the end of summer gardening season. Although there are things to plant in fall and spring, nothing offers the diversity of produce that springs from a summer garden. What is a gardener to do then, when the sudden urge for an ear of heirloom corn or a single pole bean comes on strong in the dead of winter.

Carrots from the Bird Back 40
My friends, we are prepared!

One of our favorite evening meals, especially during those weeknights after a long day at work, is a simple soup that contains ground turkey, a bit of broth, can of tomatoes and a can of Veg-All. The wife that is Venus stumbled upon this recipe some years ago, and it's been a staple in the Bird Houze ever since. Add in some freshly baked crescent rolls and you've got yourself one quick and easy supper.

This meal is that much better when you can add a can of tomatoes or tomato sauce that came straight from the Bird Back 40 the previous summer. As I took stock of what was left in the summer garden some weeks ago, it suddenly struck me, why purchase the canned vegetable stock known as "Veg-All?" Why not make your own Veg-All at home?

Leaning Towers of Pole Beans
We already know that anything fresh from the backyard is far superior than anything that can be purchased in the local supermarket. So why stop at canning projects that involve tomatoes and cucumbers? Why not put that overproductive carrot patch that would make Bugs Bunny jealous to good use? Our pole bean planting efforts now strongly resemble the Leaning Tower of Pisa. And although this year's corn crop was nothing to write home about, there was still enough there to add to the mix.

Three garden vegetables = Homemade Veg-All.

Fresh Heirloom Garden Corn
One important thing to consider before we move even further into this project is this: This project involves the use of pressure canning equipment. Water bath canners simply do not provide the pressure needed to safely can non-acidic vegetables like this, unless additional acid in the form of vinegar or lemon juice is added. At that point, you wind up with pickled vegetables rather than the canned variety. Even with our pressure canning equipment, Venus and I added a tablespoon of lemon juice to each pint jar before canning, just to play it safe.

Chopped and Ready for Processing
I must say, this has been an excellent year for carrots of all shapes and sizes in the Bird Back 40. The same holds true with the pole bean crop that we planted in July after removing a less than stellar garlic crop. The planter beds that dot the Bird Back 40 don't stay empty for very long. Once one crop is removed, the tired soil is amended and new seeds are added for the next crop.

But, I digress.

Parboil and Can
This is a much simpler project than canning tomato sauce, whole tomatoes and salsa. Those canning efforts involve a number of different steps before the actual product is added to jars and placed inside canning equipment for processing. For a simple vegetable mix like this? It's pick, clean, chop, mix together, parboil and can. The only difference is processing time -- about 45 minutes at 15 lbs. pressure. Just the simple act of processing can take several hours, especially if you have more jars of product than canning space in the pressure canning equipment.

But the payoff is a sweet treat during those cold winter months. If popping open a jar of home-canned tomatoes or tomato-sauce brings that sweet smell of summer into the kitchen, I can only begin to imagine the smells and taste that our vegetable canning efforts will bring.

SIMPLE WINTER SOUP

1 lb. ground turkey
1 tablespoon oil
1 onion
4-5 cloves peeled garlic
1 14.5 ounce can beef broth (water and beef bullion works just as well)
1 14 ounce can whole or chopped tomatoes
1 can Veg-All
Fresh or dry herbs

Fresh Garden Veg-All
Use food processor to ground garlic into bits and cut onion into appropriate bite-sized pieces. If you don't have a food processor, use a blender, or put a butcher knife to good use and start chopping. Add onion, garlic and ground turkey to soup pot containing oil, and proceed to cook on medium high heat until meat is cooked and no longer pink.

Add beef broth, tomatoes, Veg-All and herbs of your choice (Venus uses a mix of basil, oregano, cilantro, marjoram, whatever she has handy) and bring to a boil. Simmer for 20 minutes. Remove from heat, or just turn the stove off and allow soup to cool slightly before serving. Pop some crescent rolls or any other role into the oven for ten minutes and serve with soup.

Enjoy!

The Relic

Saturday, September 1, 2012

Plain Old Tomato Paste (YAWN)
The item pictured to your immediate right no longer serves any useful purpose. It is covered with dust. It sits in a kitchen cupboard accomplishing nothing at all other than blocking our path from other useful food items. It is as useful as that old television set gathering dust in your garage. If this was the "Utlimate Computer" episode from original Star Trek series fame, the name of this can would be "Captain Dunsel."

It short, it is the "most uninteresting can in the world."

So why keep it around then? That's a good question! Perhaps it serves as a reminder of a different time in our lives.  Perhaps we might need this in a pinch one day in the near future, however I doubt that very much. It has as much use now as that old jar of Herdez brand salsa, which has since been washed out and now contains syrup for pancakes (recycling! It works!).

Recent Garden Harvest-Salsa Anyone?
This is the State of Bird -- 2012. Venus and I haven't purchased a jar of anything containing a tomato product in God-knows-how-long. Purchases of tomato sauce, tomato paste, whole tomatoes, cut up tomatoes, tomatoes with herbs, tomatoes-infused-with-garlic, hot salsa, medium salsa, etc. haven't been on a Bird shopping list for years. This is what it means to garden. Call us snobs, and perhaps we are, but why buy any of these things when we can create an even better product and bottle it up at home?

Snobs we are. Because that's what we do. And, perhaps, it might be the reason why I haven't been blogging much as of late. August means harvest season in the Bird Back 40 -- and what a whopper of a harvest it's been. Although it's petered off somewhat, the garden will continue to produce as long as weather permits. And if the good Lord gives us the kind of weather that pays off in another 15 pint jars of lip smacking Roasted Garlic, Pepper and Heirloom Tomato Salsa, Herb-infused tomato sauce or additional quarts of whole heirloom tomatoes -- I won't complain.

Herbed Picante Tomato Sauce
Our latest project containing garden grown goodies is pictured upper left. Harvests like these were the norm during the months of July and August. And with each and every harvest of peppers, tomatoes, herbs, etc -- a tasty canning project awaited. Would it be fresh cut up tomatoes with herbs and peppers? Pickled peppers perhaps? Sliced and pickled Mucho Nacho Jalapeno peppers? It really depended upon what the garden gave us on that particular harvest day.

If there's one other hard lesson I've learned about home-canning efforts, it's this. One does not make an appointment with the garden to tackle a canning project. The garden doesn't make an appointment with you, either (next Sunday good with you? OK!). The vegetable garden tells you when it's ready. Best be prepared. Miss a day? Miss a lot. When the garden is ready, you're ready. Those fifty ripe tomatoes aren't going to sit around and wait for you forever and a day.

Whole Tomato Canning Project-Summer 2012
Although we're far short from calling ourselves master canners -- or master anything for that matter -- we've done this enough times to know exactly what kind of tools we'll need and what kind of jobs must be accomplished. Putting together a home-canned salsa -- for example -- is far more difficult than a project of whole tomatoes. A simple batch of Roasted Garlic, Pepper and Heirloom Tomato Salsa is far from simple, and requires multiple steps from roasting to peeling to chopping to processing.

Exact measurements are an absolute must for projects like these. If you're not following time-tested canning recipes to the letter, or pushing the envelope a bit, you're risking a trip to your local hospital and a stomach-pump procedure. Although a procedure like this has never been performed on yours truly, it doesn't exactly sound like a fun way to spend a Saturday night!

A Caitlin Contreras Original
Naming rights also come into play when you're tackling a project like this. Who wants to give a home-canned project a name like "tomato sauce" or just plain ol' "salsa." Why confine yourself to terms like "medium" and "hot" on the spicy scale? Why not "volcanic" instead? Or -- hold a Facebook naming contest as we recently did for our last batch of salsa. Although Dan Vierra (former Sacramento Bee garden editor and writer) was on his game with suggestions like "Cremation Mix," it was Caitlin Contreras who knocked it out of the park with her suggestion of "Almost-As-Hot-As-Venus."

The wife that is Venus approved. Caitlin's double-entendre name selection also earned her a free jar of salsa.

The payoff for all this hard work comes in the dead of winter. Grocery stores are selling rocks disguised as red tomatoes for $3 lb. or more.  Although you can pick up two or three cans of off-brand sauce for a buck, there's nothing quite like the feeling or SMELL of opening a jar of heirloom tomatoes that you processed the previous summer. That fresh-from-the-vine harvest smell and experience wafts up and encompasses an entire kitchen.

Summer's Bounty: Heirloom Tomatoes
That, my friends, is the payoff. This is what makes all that hard work worth it and more. Dinner that night will be reminder of those carefree warm summer days.

Snobbery has its rewards.

Did someone say recipes? You can find the recipe for our original Roasted Garlic, Pepper and Heirloom Tomato Salsa here. Another favorite is posted below. All have been tested and are "canning safe."

Herbed Picante Tomato Sauce
(a Sharon Howard original recipe)

NOTE: Food processor or blender required...You will also need canning equipment like this.

24 cups smooshed tomatoes whirred smoothish
4 cups chopped herbs of your choice
1 cup finely chopped jalapeno peppers (including seeds)
12 TBSP bottled lemon juice
2 TBSP coarse salt.


I use basil, oregano and parsley but you can use only one or two or three and you don't need to use equal amounts, in other words you can go 2/3 basil 1/3 parsley just DON’T increase the amount of herbs or peppers. Bill and Venus use whatever herbs they have in large amounts from the herb garden. This includes basil, oregano, sage, majoram, spicy oregano, thyme, etc.

Directions:

Fresh Garden Herbs
Add all items together and bring to a rolling boil. Lower heat to a high simmer, you want to see some action but not a full boil. After coming to the boil a foam will form, skim it off.

Place your one-pint canning jars in the dishwasher, when the jars are done so is the sauce. I generally cook about an hour, you can go longer. I don't like to cook less than an hour 'cause I want some thickening to take place while canning so it doesn't need to much cook time when I use it.

Place canning lids into a pot of hot water after washing. Bring to a simmer, but not a full boil.

Fill jars as normal. Wipe tops of jars to ensure a tight seal. Seal to finger tight with lids and rings. Hot Water Bath for 45 minutes. Or pressure can at 15 lbs. for 25 minutes.

Onion Ring King and Queen of North Natomas!

Saturday, August 11, 2012

Homer Bucket of Onions: Partial Harvest
It's about that time of year when the wife that is Venus and I play this little game of "let's make dinner." That is -- we will tell one another that we want to make a particular dish, but need to purchase things such as "tomatoes, peppers, zucchini, onions, green onions, etc."

Of course -- this is our version of a ginormous joke -- since we have ginormous amounts of these things protruding from the summer garden beds. We've reached that Nirvana time of year when every carrot is at least a foot long and two inches thick, each tomato weighs at least a pound and is loaded with flavor and one green onion is larger than the bunches of five or six green onions sold at the local grocery store.

A Garden Whopper: The Candy Onion
In short? Gardening life is good. It's very good. Every meal features something fresh. And if it doesn't? Someone made a royally bad mistake. Even something a simple as a frozen pizza tastes better with extra toppings of chopped up bell peppers and green onions. And WHY are you eating frozen pizza when you can whip up a garden fresh soup featuring a hodge-podge of fresh this and that?

The frozen pizza can sit and wait in the freezer.

It is indeed harvest time on the Bird Ranch for Wayward Heirloom Tomatoes. The heirlooms are popping. The squash is prolific. Bell peppers make for a sweet and tasty treat. But one of the bigger successes just came out of the ground just last month: one of the largest and sweetest onion harvests we've ever had the pleasure of taking part it.

Bunches and Bunches of Candy Onions
No matter where you turn in the Bird GarageMahal, you're going to run into a Homer five gallon bucket of onions here -- or another five gallon bucket there. Or you just might run smack dab into onion monsters that are hanging and curing from an exposed set of rafters. Short and sweet? We got onions. Lots and lots of onions.

I would have to characterize this year's "onion experiment" with Dixondale Farms in (flat as a) Pancake, Texas a tremendous success. I have never grown onions this huge or this tasty before, and never before in the numbers that we experienced this year. Sure -- there were a few "duds in the bunch." But that's to be expected with just about anything when it comes to gardening (at least for yours truly). But as I began to pull mammoth whopper after mammoth whopper from the ground, I knew this was one of them rare experiments that had totally succeeded.

Onion Starters in February
Excuse me while I cry for a moment. This just doesn't happen often.

Unlike past years, when I would plants onion and garlic bulbs at about the same time of year (October), I waited to order my onion crop. It wouldn't arrive until early February. In the meantime, I educated myself on what I had done wrong in the past. I would come to discover that no onion is like the other. All of them are different. Some grow well in some areas. Others do not.

It was during this research that it dawned on me that purchasing that package of onion bulbs from my local nursery in September or October wasn't the wisest of decisions. Sometimes those packages contained onion bulbs that were not intended for, nor would grow to a large size, in the Sacramento Valley. Why would a nursery or Big Box store do that? Simple! It's the same question as, "why would they sell that Hass Avocado tree" when they know it will perish in our cold Sacramento climate?" Or, "why are they selling tomato plants in February when tomato planting season isn't for another two months?"

Red Candy Apple Onions
Simple! It's because people who don't know any better (see: Bill Bird) will happily fork over $20 for it. And if it dies? That's OK too! Because the people who sold you the wrong kind of onion bulbs or that avocado tree that kicked the bucket know all too well that you'll be back in another couple of months to fork over another $20 in a vain and wasted attempt to correct the problem.

It's called "marketing for dummies."

I finally got around to listening to the patient advice of a South Natomas vegetable gardener who has been at this game a little bit longer than I have, and gave into his suggestion of giving Dixondale Farms the old college try. After reading, and more importantly, understanding the different between "long-day, intermediate-day, short-day" and "Green Day" onions, I finally understood what I'd been doing wrong.

Green Day Onions. KIDDING!!! They're CANDY!
Note: To the uninitiated, there is no such thing as "Green Day" onions. If you ask for them at a nursery, you're likely to earn a howl of laughter or a blank stare. "Green Day" isn't an onion. "Green Day" is a rock-n-roll band.

Short and sweet? If you plant the right kind of onion bulb or onion start, fertilize, water and care for it properly, you will be rewarded with monster-sized onions. Monster sized onions mean monster sized onion rings -- made with a fresh beer batter.

Sure! You can use your onion crop for healthy things like salads and such! There's nothing wrong like that! But only I can tell you the wonderful taste behind taking a healthy thing like a freshly grown onion, dipping it into a batter and dropping it into a vat of hot oil!

Mix in rings procured from a home grown Super Star white onion, add in some beer, flour and salt, and you've got a meal fit for a King or Queen.

Simple Beer Batter Recipe

1 cup beer (the better the beer, the better the onion ring)
1 cup flour
1 egg
1 teaspoon salt
1 teaspoon paprika
1 teaspoon onion or garlic powder
1/2 teaspoon cayenne pepper
Vegetable oil for frying

Onion Rings in Waiting
Mix all items, minus the vegetable oil, together in a bowl until smooth. If the batter does not take on the consistency of a pancake batter, add more beer.

Cut off both ends of an onion (preferably home grown), and proceed to cut into slices anywhere from a half inch to an inch thick. Separate slices into individual rings.

Fill frying pan with raised edges with a half inch of oil and heat to medium-low. Proceed to dip each onion ring into the beer batter, using tongs to add directly to hot oil. Turn when edges turn light brown. Remove from heat when both sides are light brown and drain. Add additional salt, if needed, for taste, or a favorite dipping sauce!