Showing posts with label garlic. Show all posts

The Domek Family Chicken

Saturday, December 6, 2014

Domek Family Chicken Before Cooking
Now that you've finished off the last of those pesky Thanksgiving leftovers -- it's time to get back to some normal eating behavior, right? And, lucky for you, I've got a dish that is just about perfect for anytime of the year -- be it holidays or be it just a normal weekend.

There is no official name for this dish so I've taken the privilege of naming it the "Domek Family Chicken." I'll be honest with you. The "Domek" stands for a Sacramento gardener by the name of Andy Domek, whom I'm fortunate enough to work with at the State Capitol. Who says Democrats and Republicans can't get along? Andy's the Democrat. I'm the Republican. Which just goes to show that gardening blood may be thicker than political.

Rosemary Bush-Bird Back 40
We all agree on one point: This is one fine chicken. It's a beer can chicken type recipe -- but it's unlike any beer can chicken recipe I've run across before. I've also taken the advantage of modifying this recipe somewhat to add in some spices that are growing well -- perhaps too well I might add -- in the Bird Back 40.

That particular spice is featured above left. This is an "after" shot by the way. This was taken "after" I'd hacked this plant back to manageable proportions. It wasn't easy. It had grown across the sidewalk during an uncontrolled spring and summer growth spurt. Hacking it back took the better part of an afternoon. And while it looks rather sad right now -- don't be worried my friends. This plant will explode with new growth once next spring rolls around -- trust me.

Dried Rosemary Anyone?
How do I know this? Because this particular plant of the herb variety grows like a weed in the Sacramento area. By now you've probably guessed this "herb weed" is, in fact, rosemary. Half of North Natomas is landscaped with rosemary because it's so easy and cheap to grow. Its blue flowers yield tons of pollen for foraging bees. And rosemary with chicken goes together like vanilla ice cream and hot fudge sauce. The two were made for one another.

The Domek Family Chicken recipe didn't originally call for rosemary. But I'll tell you this much -- it was one fine addition. It added a spiciness and flavor that really made this a unique meal. Another addition was the garlic. Not because I wanted it. Garlic was an absolute requirement.

Rosemary
If you've ever worked with rosemary before -- especially fresh rosemary -- you've come to learn that this is one tough herb to chop up. The leaves of the rosemary plant are incredibly tough. How tough? I've placed rosemary leaves stripped from woody stems into a standard food processor, flipped that switch on high speed, waited for 30 seconds and then shut it off only to find out that the rosemary leaves were still intact. They're extraordinarily tough to shred into tiny pieces.

Yet -- tiny pieces is what I needed.

But I've learned a trick during the rosemary preparation process. Combine those tough rosemary leaves with seven or eight cloves of garlic in a food processor set on high speed and something wonderful happens. Those rosemary leaves suddenly give up the ghost and can be shredded into tiny bits and pieces. An added plus is shredded garlic that sticks to the rosemary like glue.
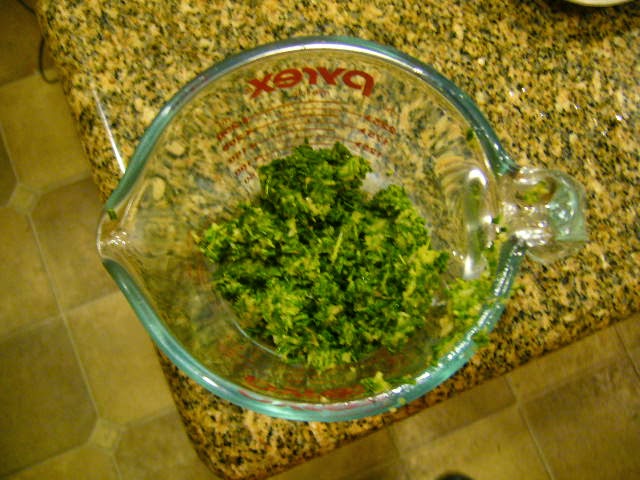
Chopped Rosemary and Garlic
Just what I needed.

Andy's directions were fairly specific. Once all of the spices were mixed together, you were required to spread it generously all over every inch of the chicken. This included shoving quite a bit of this seasoning mixture UNDER the skin. This is no easy task because if the skin breaks during this process, well, it's tough to keep this mix from falling off the chicken and onto the grates of the barbecue below. So, please, do be careful.

If you've never cooked chicken in a beer can setting, there are some things you'll want to watch out for. First -- you'll have to find some way to open and drain off all that beer. It's a terrible thing, but someone's got to do it. If you happen to have a lot of spare herbs thanks to a well established herb garden like we do -- the next step is to cram as many herbs into that beer can as possible. The final step is to fill it back up -- about halfway mind you -- with a nice white wine like chardonnay or sauvignon blanc.

Beer Can Chicken Roaster
If this means you have to open, and then finish, a bottle of wine -- well -- someone has to suffer. Might as well be you.

There are beer can chicken roasters that can be purchased at your local store like the one pictured, but I'll be honest, you don't really need one. It does make the transfer of the chicken to the can a little easier, but it's not absolutely necessary. To prepare the well-seasoned chicken for grilling, using Andy Domek's fine words of advice: "Place the cavity of the chicken over the beer can, tuck the wings behind the body and sit it up on the grill so it looks weirdly like it is lecturing you. Set your barbecue on low heat and roast for 60-70 minutes."

Another bit of added advice? Be armed with a well filled spray bottle and pay close attention to the chicken for at least the first 30 minutes as the barbecue will sometimes flare and we don't want to be setting our fine chicken friend on fire, now do we?

And now -- the recipe for Andy Domek's Famous Beer Can Chicken:

Andy Domek and a TURKEY???
1. Open a can of cheap beer (I personally am fond of the award winning beer out of Wisconsin -- Pabst Blue Ribbon).
2. Drink Pabst Blue Ribbon.
3. Shove some herbs inside the can -- I like a sprig or two of rosemary and fresh thyme. Fill can halfway back up with white wine.
4. Set aside.

Make a paste with:

1 tablespoon kosher salt.
½ tablespoon cinnamon
½ tablespoon ground ginger
½ tablespoon cumin
½ tablespoon turmeric
½ tablespoon coriander (optional—I like coriander so I add it)
1 teaspoon of black pepper
4-5 tablespoons of fresh rosemary leaves (dry is fine too)
4-5 cloves of garlic
2 tablespoons olive oil
Juice of one lemon or lime

Directions: Chop rosemary and garlic together in food processor until it reaches a fine paste. Add together with salts, spices, olive oil and the juice of one lemon or lime. Mix well. Coat chicken with mixture, loosening and lifting skin to place spice mix directly on chicken.


Roast for one hour.

When Gardening Stops

Saturday, December 8, 2012

Gazing at the Bird Back 40 Garlic Crop
There does come a time in life where gardening does come to a complete standstill. I hate to say that I really haven't done much of anything lately, other than watch the garlic grow and witness other beds become overgrown with weeds or flowers from past seeds that failed to germinate at one time or another.

What, pray tell, brings about a halt in all gardening activities? Well, it wasn't the words from the wife that is Venus. Don't worry fair readers. Everything is fine and dandy in that department. In fact, life has never been better.

But there are other matters that can bring a temporary halt to the lifestyle that I love. And when that surgeon started in with a list of questions some weeks back, suddenly, priorities changed somewhat.

What, pray tell, would that question be?

Thought About This?
It was this question, a simple one really: "Have you made out a will?" Many people will ask this question of you over the course of a lifetime. Most of the time? There's no reason to worry. But when a treating surgeon asks this question? The time to worry is now, my friend. The time to worry is right now.

Surgeons don't have the time to crawl or tippy-toe through verbal minefields. If they ask? You answer. And it's probably best not to hide anything.

The famous stomach-ache that led to this rather eye-popping question came on during the day after the President's Day Weekend. That would be Tuesday, November 13th. I had just finished up a nice three-day weekend and even found time to juice half of a pomegranate crop from the Wonderful pomegranate tree located in a side yard of the Bird Back 40.

Pomegranate Juicer (It works!)
As I now recall, I would have juiced that entire tree, but my energy level just wasn't what it should have been. I was ready to call it quits after juicing more than a gallon of pure, deliciously sweet pomegranate juice. It was the first time I'd ever attempted something like this with a juicing contraption that the wife that is Venus bought for me during Christmas last year.

It worked like a charm.

At first I believed I'd probably mixed far too much gin with that fresh juice over the three-day holiday! My stomach will sometimes grumble if I consume too much alcohol in any one sitting, and man was that juice good! "It had to be that," I thought at the time.

But as the pain grew, and efforts to keep it in check failed, it suddenly dawned on me that not all was well with the Body of Bird. This was unlike any stomach problem I'd experienced before or since. The chills and fever that set in some hours later were also unique. I'd never experienced anything quite like this before. Stomach aches? Yes. Chills and a fever? Not since I was a teenager. That was a long time ago, people.

Although I just wanted to stay in bed and wait this thing out, the wife that is Venus would have none of it. Off to the North Natomas Med-7 clinic I went later that night, with Venus dragging me every step of the way. She was more concerned than I. Did I also mention she's also just a tad smarter than I am?

When the Med-7 treating physician got one look at the urine test that could have passed for orange colored Koolaid, he didn't bat an eyelash. "You are severly jaundiced," he told me. "Jaundice? What the Hell was that," I thought. I may have also said it out loud. Which is when he stopped trying to explain, and called for an ambulance instead. That will shut a cranky patient up.

Ambulance? Really? I guess this was kinda serious. As the surgeon explained to me the next morning after a night of tests at the Mercy General Hospital Emergency Room, it was. This was distressing news. It wasn't something I was expecting to hear. I wasn't ready to hear it.

Pancreatitis? Really?
"The enzyme levels from your Pancreas are sky high," the doctor told me. "You have a severe case of Pancreatitis."

"Pancreatitis," I thought. It sounded rather familiar. "Oh yeah," I remembered. That's what dad died from in 1973. And then, suddenly, reality: "Oh shit! You can't be serious!" But this time the joke was on me, people. Dr. Bozdech was dead serious. I had the same disease that took my father's life at age 57 in 1973. Pancreatitis is nothing to laugh at.

What is Pancreatitis? There are many forms of it. In my father's case, it developed into Pancreatic Necrosis and eventually Pancreatic Abscess. Although these cases can be treated now with better and stronger medications than were available in 1973, they can still be deadly. If allowed to spread it leads to multiorgan failure and eventually, death.

Tsk, tsk, tsk...
There are two known causes of Pancreatitis. One cause is heavy drinking. "Great," I thought. "My affair with cheap gin is paying off in ways that I did not expect." The second cause is blocked ducts thanks to a gall bladder that is spitting out stones instead of enzymes that are produced by the liver.

In my case? Despite my love affair with all things cheap gin, I simply didn't drink nearly enough to be classified as a patient with an "alcohol problem." I still did (key word, did) drink too much. But not enough to bring on a case of Pancreatitis. Multiple tests would soon reveal the true culprit: my gall bladder was spitting out stones that had blocked multiple ducts.

Although I felt somewhat better, as I would come to find out, this was still a huge problem. There was no room for a problematic gall bladder in the Body of Bird. It would have to come out, right quick too. But that was just the first problem. The gall bladder, as my surgeon would later explain, had actually stopped doing the job it was intended to do quite some time ago. Dr. Hunt explained that the blocked ducts would have to be cleared first, before any other surgery could take place.

But even before any of this could happen, the cranky pancreas had to CALM DOWN! By calm, I mean it had to stop spitting out enzymes that were no good for the body. Despite the many advances that have come with medical care since the advent of the digital age, there is only one sure-fire way to calm down a cranky pancreas: a diet of no food whatsoever.

Hospital food: Verbotten!
"What's that," I repeated? "No food? Not even crappy hospital food? This is a joke, right?" As it turns out? The joke was on me. I can't blame the nurses for grinding percocet (oxycodone) powder into cups of ice and water and water and ice, the only food I was allowed to have. By Day 3 of the "no food whatsoever" diet, I had become one very cranky individual.

"How long will this last," I whined one night to Doctors DeBose, Hunt and Bozdech, who would gather in my room nightly for one update or another. The answer from Dr. Hunt wasn't too encouraging. He smiled as he explained that people could actually go for WEEKS without eating. And, in some cases, it might take WEEKS for a cranky pancreas to stop being cranky. The surgeons may have smiled upon informing me of this news, but I wasn't. I wanted an end to this nightmare. But it was just beginning.

By Day Six of the "no food whatsoever" diet, the cranky Bill Bird had capitulated completely. There were ongoing discussions (some might even day disputes) between treating physicians as to whether the numerous gall stones blocking various ducts should be removed first -- or the problematic gall bladder get first treatment. At this point, after six days of ice and water, needles protruding from this arm or that arm, I really didn't care. They could have removed every organ in my body at this point, and I wouldn't have so much as batted an eyelash.

ERCP: Not for the Faint of Heart
I can now understand why the treating Gastroenterologist had voiced continual concerns about the procedure to remove gall stones from blocked ducts. The procedure, known as Endoscopic Retrograde Cholangiopancreatography or ERCP, is anything but easy. Physicians were concerned about the stress on my heart. And since I have had previous heart troubles...

No matter. The procedure had to happen. Otherwise, the pancreas was toast. One can live without a gall bladder. But not without a pancreas. Surgeons would enter the troubled duct area via a tube inserted into my throat, into the stomach, and then into the duodenum. Small cameras would reveal the presence of the troublesome stones, which would be removed, provided all went well of course.

Waking up from a procedure like this is just a small taste of Hell on Earth. One must learn how to breathe all over again. As you hack and cough from the fluid that has entered the lungs, taking even the smallest breath becomes a herculean task. I suppose this is how one feels when drowning, and it's not an experience that I wish to repeat. As the breathing muscles finally figured out how to work again, the treating surgeon entered the room with vacation photos from his trip to see the various monument stones near the cranky pancreas.

There were more than I expected. The surgery had been 100% successful, but left me weaker than I had been before. And, after six or seven days sans food? You're a pretty weak individual. I nearly jumped from my bed, however, and did the "happy dance" when treating physicians upgraded my diet from water and ice to clear liquids such as broth and jello. Broth never tasted so darn good.

Although I was well on my way to recovery, the battle was half over. The gall bladder responsible for this little problem and near miss with pancreatitis was still there. It was still filled with stones and still a threat to send those stones on a merry little journey. It had to come out -- and rather quickly I might add -- after the ERCP journey. Surgery would take place less than 24-hours after the ERCP procedure.

There was a point in medical history, not all that long ago I might add, when surgeons sliced open a patient like a freshly caught fish to remove a troublesome gall bladder. Though this sometimes still happens, most of the time a gall bladder can be removed through a Laparoscopic procedure. Though less invasive, three or four small holes cut into the stomach still leave you feeling like a wildfire has raced through your belly. I still can't begin to describe the level of pain I woke up too, despite repeated injections of Dilaudid and other painkillers.

NEEDLES!
That surgical pain would persist through most of the night before finally abating the next morning. And then? As soon as your treating physician sees you up and walking around? The journey is over. It is time to go home. And, on Day 8, mere hours after gall bladder surgery, the IV needle that had ruled my life for what seemed like forever and a day was removed. I don't miss it.

I suppose I could tell you about my various roommate adventures during this time, my experiences with Methadone Mitch, Mentally Retarded Randy, or even Lucky Bob (a 76-year old patient stabbed by his 36-year old girlfriend). But I'll save those stories for another time and day.

For now, I sit at home and look at the weeds slowly taking over various garden beds, waiting for my first opportunity to attack the dirt and finally declare that "life as normal" has returned. But that's for another day. For now? Gardening has stopped. But this is a temporary break at best. The desire to dig in the dirt has returned, but those troublesome scars aren't ready to be pulled in this or that direction just yet.

For now? I mark the days. The fun and joy that comes from digging in the dirt will eventually return.

THE END? My thanks to Doctors Andrew Bozdech, Renee DeBose, Ben Hunt and the numerous nurses and other care specialists who I irritated to no end during my one-week plus stay on the second floor of Mercy General Hospital in East Sacramento. Without you, without all of your efforts, I probably would not be here. Thank you for saving my life.

The Garlic That Almost Wasn't

Thursday, November 8, 2012

2013 Bird Garlic Crop
The picture to your immediate right will indeed confirm that the 2013 garlic crop is indeed planted in the Bird Back 40! Not just planted -- but literally jumping out of raised beds that dot our crazy little cul-de-sac corner dedicated to all things vegetable and fruit. 

So what's the big deal? We grow garlic every year, right? Well, yes, that is true. Except that this year it nearly didn't happen. This year was nearly a complete bust thanks to election limits on my free time and the Ultimate Digging Machine known as Bandi the adorable mutt.

Damaged Planter Bed
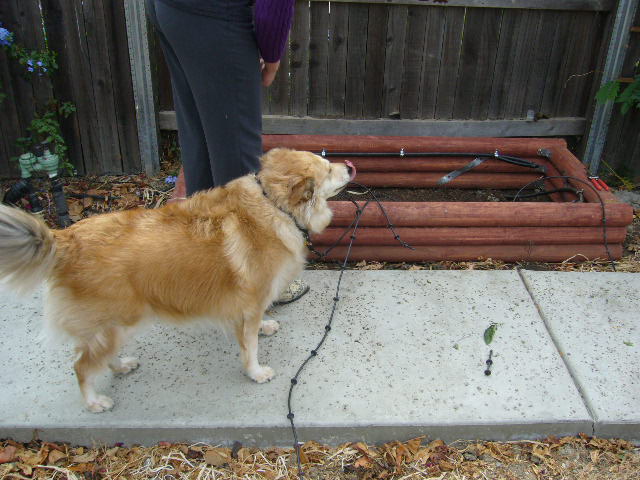
As it turns out  -- the mutt is good at not just digging. Seems she can take apart a planter bed with one swift kick of a back leg. And she managed to do just that some weeks back -- destroying a planter bed that was destined to hold the Bird 2013 garlic crop.

I have always wondered how long these cheaply constructed gardening beds were going to last -- and now I know. Profiled here several years ago, it appears these "gardening beds on a budget" have a lifespan of five to six years. After that? It's time to repair, rebuild or in my case, start from square one.

Ultimate Digging Machine at Play
The first hint of trouble came when I spotted fresh dirt on the ground and knew that digging doggy had been up to no darn good. Bandi is clearly past her "puppy stage," but that playful and somewhat destructive side does surface every now and then. That's especially true if she spots a vole (field mouse) duck into one of the beds.

A vole? I must DIG! I must FIND! Do voles taste like BACON? I must find out!

Although the cats that grace the Bird Back 40 get their fair share of "vole treats," these thing reproduce so quickly and in such massive numbers that there's always one or two for Bandi to chase in a futile effort from gardening bed to gardening bed. Keep in mind, she never does catch one. She just leaves her tell-tale sign behind, which is usually a nice little hole in the ground or bed.

Yes Fred, I know. You warned me. You were right.

Gardening Bed Damaged Beyond Repair
When I first noticed that the Ultimate Digging Machine had partially destroyed part of one of my older planter beds, my thoughts first turned to "repair." A few well placed gold screws, I believed, would solve this problem. After all -- the bed had been screwed together once before. It certainly could be repaired in the same fashion, right?

Wrong.

I would come to discover that the Ultimate Digging Machine had finished what Mother Nature started a long time ago. Wood that once those golden screws so securely was now so brittle that it fell apart into tiny pieces at the slightest touch. It was done. It was finished. There would be no repair. There would be no 2013 garlic crop.

Or so I first thought.

Damaged Gardening Bed Logs
But the more I thought about it? I just couldn't let it go. This bed has been the source of so many mouthwatering crops and harvests that I just could not write it off. I grew champion Cherokee Purple tomatoes in this bed! Last summer's crop of green onions and several different types of basil was raided quite often I must say. Lettuce had grown here in the fall. The last harvest had been a fat onion crop.

Let it go? Write it off? Leave a big hole in the ground? Perish the thought. As Oscar Goldman of Six Million Dollar Man fame once intoned: "We Can Rebuild Him." It wouldn't be easy. This was bare, open ground when I built the first bed five years ago. There was nothing to get in the way. The rose bush to the left of the bed was added later. That honeysuckle vine covering up our second beehive was added later. And that nice little sidewalk framing the bed against the fence was added just this spring.

Gardening Bed and Drip Irrigation System Removed
In other words, I didn't have a lot of room to operate. And, to add insult to injury, the old bed would have to be removed piece by piece, along with the drip irrigation system, before I could proceed with new bed building efforts. Removing an old, wooden garden bed is quite the inconvenience to the Black Widow spiders and other creepy-crawlers that had since moved in and long ago called it home.

The first step involved removing numerous layers of gardening soil. It was removed the same way it was added -- with shovel and wheelbarrow. I would come to discover that those golden screws that had held the bed together so securely years ago had since disintegrated and would sometimes just break into two brittle pieces upon removal. Some of these "Lincoln logs" as I call them were so brittle they easily snapped into two or three pieces once they were removed. Years of gardening and usage, plus natural elements of rain, cold and heat can do a lot of damage.

We Can Rebuild Him
Yet -- up and out the old bed came -- piece by piece -- leaving surprised spiders and insects to bolt and scramble away. I was left with a bare spot in the ground and started over with the same system I had employed so many years ago: Assemble the new bed in layers, stack, align, screw and reinforce. The re-installation of the drip irrigation system allowed me to make several improvements that will serve to save precious water supplies, yet ensure that the irrigation reaches every last corner.

By the end of the day? The new bed, which looks a lot like the old bed (minus the black widow spiders), had been installed. Old, tired soil was mixed in with some new planter mix and compost, and what was once old and tired was new again. Venus planted the garlic varieties of Lokalen, Bogatyr and California Late White in short order. The cloves have since sprouted, and everything looks just dandy.

Goodbye Old Bed: Hello Potash!
As for the remains from the old bed? I have quite the growing pile of lumber scraps from previous bed building efforts and other "around-the-house" projects. I wasn't interested in growing the size of that scrap pile, which is why I was happy to have a handy-dandy fire pit installed this previous spring.

Old wood burns fast and hot and leaves behind a helpful gardening supplement: potash or potassium, which is an essential ingredient for any gardening project.

And, as for the Ultimate Digging Machine? She most definitely approves of the new addition. Here's hoping that next "urge" to dig strikes in places where I want to add additional fruit trees next spring.

Flaming Lips

Tuesday, July 24, 2012


Claussen Style Refrigerator Dill Pickles
I'm not going to make many friends by posting experiences and recipes about a dish that is so hot it will burn your lips straight off!

But, I'm going to do it anyway.

It's mid-July in the Bird Back 40 and canning season has arrived. It would be nice if one could make an appointment with the garden for such things (how does next Tuesday sound to you?), but gardens don't make appointments. And one look at the vast number of ripening tomatoes kind of makes one feel -- uneasy. Hey -- I can eat tomatoes like nobody's business. But I don't plan on bathing in them anytime soon.

Pickling Cucumbers from the Bird Back 40
In this particular case -- the growing numbers of pickling cucumbers were causing the latest bout of concern. Look! There's one there! There's another! Soon -- glee would turn to dread with the question of, "where did those other five come from?" What in the world were we going to do with all those pickling cucumbers?

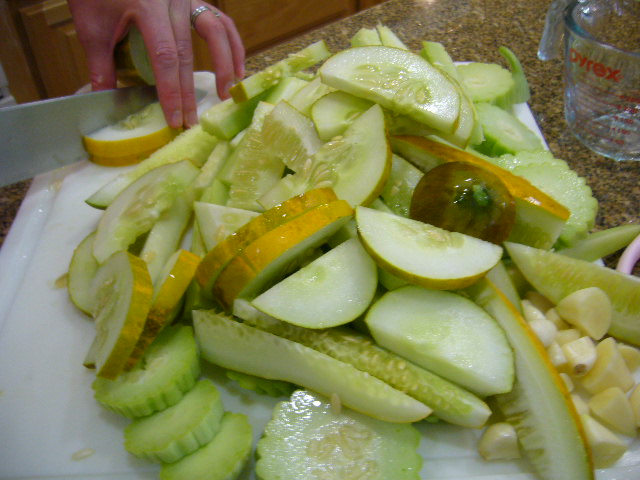
Easy! As the photo above demonstrates -- when the garden gives you pickling cucumbers -- you make pickles! You make lots and lots of pickles.

In our case that's about 12-one-quart jars and two refrigerator containers of lip-smackin (and lip-burnin' I might add) refrigerator pickles. Refrigerator pickles and canned pickles use the same types of recipes, with one major difference. Refrigerator pickles are not put through a canning process that can sometimes result in the bummer result of: soft pickles. Since you're not cooking them -- there's no chance for them to get soft. The downside to this equation is refrigerator pickles don't last as long, and can't be stored in a pantry until the urge to consume hits you.

Sliced and Ready for Canning
Thus the name: Refrigerator pickles.

I must admit kids -- I am somewhat surprised. I'm also pleased to no end. See -- this year's garlic harvest was really nothing to write home about. I had intended to write a blog posting about this latest failure because half of the garlic harvest really wasn't a harvest at all. In fact, it was a complete bust. Garlic bulbs that should have been fat and happy with flavor were instead small and soft. In some cases? They disintegrated completely after the wife that is Venus and I pulled them out of the soil.

What remained of the harvest was rather small. There were no fat bulbs of garlic to be harvested this year. The best we got was something that you could purchase from your local grocery store. Where's the fun in that? The whole point of gardening is to produce a product that you CAN'T find in the local produce aisle.

Underwhelming Garlic Harvest? Mebbe Not!
In that respect? We failed. MISERABLY!

This underwhelming garlic harvest has been sitting in and stinking up the garagemahal for about the past month --curing ever so slowly. As it turns out, this weekend's canning project was the first true test of our garlic growing efforts. Each jar would contain at least one clove of garlic and maybe more depending upon the size of said clove. How did our garlic turn out?

My bandaged lips should be the first sign that things weren't nearly as bad as I thought. In fact, the bandaged lips should indicate that this underwhelming harvest produced some of the hottest and tastiest garlic the Bird Back 40 has ever churned out. As I slowly bit into and savored that first test of home-grown garlic my eyes turned wide. They proceeded to turn even wider as that slow-moving burn sensation moved from lips to tongue to cheek. They nearly popped out of skull when the first whisps of smoke started to emerge from my ever-widening mouth.

Fresh Flaming Lips Garlic
Holy Moly! Where did this heat come from? My lips are on fire! Quick! Water! Something! Ice! Defibrillator! 

This is some good garlic! Much better than I ever could have imagined. Perhaps things aren't nearly as bad as I had believed they were.

Will the burn of the garlic transfer and infuse the dill pickles that are now slowly marinating on our front kitchen counter? Quite possibly. It's one reason why this year's refrigerator pickle production didn't also include a jalapeno pepper for each jar. We didn't feel the additional heat was needed. Our intention isn't to send our consumers screaming to the nearest available fire department location. Our intention is to provide them with the best pickle taste ever.

Not Concerned With Pickles Nor Garlic
The best pickle taste is a mix of many things. It's salty. It's sweet. It's hot. It's cool. It's briny. It tastes like butter. In short -- it tastes like no pickle you've ever tasted before.

That's the goal with home-canned pickles. Sure! You can buy those kosher dills in any supermarket. Spears or chips -- you'll find them there.

But they won't taste anything like what we've got here. They probably won't burn your lips clean off either. Which, I suppose, is a good thing. But when burned lips result from a harvest that was better than expected -- well -- it's almost worth the price of Ace brand bandages.

CLAUSSEN STYLE REFRIGERATOR DILL PICKLES

This recipe is measured per jar, with the exception of the brine, depending upon the number of pickles you can pull from the backyard garden patch. We prefer pickling cucumbers, because they are a tad tougher than slicing cucumbers. Armenian cucumbers also work well because those tough skins retain that crunch, even after brining.

Fresh Dill Weed
The basic water to vinegar ratio is three cups water to two cups white vinegar. Some recipes call for using cider vinegar, but that didn't sound appetizing to us, so we're sticking with straight, standard, white vinegar. Feel free to double or triple this brine amount, but stick with the ratio of three cups water for every two cups of white vinegar.

Bring three cups water to a boil and remove from heat completely to cool. After water has cooled -- add two cups vinegar. This is your standard brine mixture.

The ingredients listed below are what we used for each one-quart jar of pickles. You don't have to use one-quart jars. One gallon jars work just as well, or even plastic containers (think Gladware, Rubbermaid, etc.). We put our jars into a water bath canner for ten minutes to sterilize properly, but there are others who just run them through a hot dishwasher.

To each one quart jar, adding the following:

Two to three sprigs of fresh dill (which you remembered to plant this past spring)
One to two cloves of garlic, whole or cut in half
One Bay Leaf
One tablespoon of sea salt or canning salt
One teaspoon each of dried dill, mustard seed and peppercorns


Packed Jars: Ready for Brine
Fill each jar with the required amount of seasonings, pack pickle spears or chips into jars, ladle in brine, seal, shake and set aside. Transfer to refrigerator after canning process is complete. Shake and turn jars upside down or right side up every day for ten days. 

After 10-15 days, the refrigerator pickles should be ready for a pickle feast. Here's hoping you don't burn your lips off.

Gardening Stinks!

Wednesday, June 16, 2010

It really does! Any gardener will tell you the title statement is indeed true. You want proof? Try smelling me after I've spent the better part of a day in the backyard.

On second thought -- don't do this at home kids.

One of the biggest challenges with a gardening blog like this one is -- how do you keep it fresh? What's new? What haven't I written about before in the past two years? Tomatoes? Scads of posts about heirloom tomatoes. Planter boxes? Been there -- done that.

But rather than blog about a specific harvest -- and a smelly one at that -- why not blog about the experience of the harvest? Every harvest is different from the last. This year -- the fabulous wife that is Venus and I grew GARLIC.


So what's the big deal then? We grew garlic last year. In fact -- we had a GREAT garlic harvest last year -- as was detailed in this very blog here.

So then? What's new? The smell and stink of garlic? If you've ever harvested 40-50 cloves of garlic -- you've come close to a stink level of 9.5. There's nothing quite like getting a whiff of some very potent stuff that's hanging and drying in the GarageMahal (it serves double-duty as a bar, TV sports hangout, and garlic dryer).

If you like the stink of garlic -- well then -- Welcome to Heaven. If you don't? The neighbors begin to chatter about the dead things you must be storing behind closed garage doors in there.

So what's new then? In a word? WORMS! The YUCK Level just blew up a few points. Venus and I were distressed -- to say the least -- after pulling up a few heads that had colonies of worms moving in and out.

And here I believed that earthworms in the soil was a GOOD thing. Not so fast there, Sherlock. They have drawbacks -- especially when your staring at one that has made a home in some of that hot Porcelain Hardneck Metechi Garlic that you've been dreaming about all winter.

Venus and I picked up the Metechi Garlic and another variety called California Early White from Peaceful Valley Farm Supply last fall after growing another variety called Inchelium Red garlic last year. Nothing against Inchelium Red. It was very good. But we wanted to try something new and different -- which is why we opted for the Metechi variety.

Believed to be native to the Republic of Georgia -- Metechi garlic has been described as one of the hottest and most pungent of garlics that you can obtain for the backyard garden. We haven't tried it yet -- because it's still drying -- but there's no doubt about that "pungent" part. Did I tell you yet that garlic reeks?

As for the California Early White? Nothing against that whatsoever. It grows well here (hence the name) and you get a lot of "bang for the buck." What does that mean? Three bulbs of Metechi seed garlic -- for example -- will set you back a good $20. But you can purchase anywhere from six to seven seed bulbs of California Early White for a cost of $5.

Did I mention we're kind of on the cheap side? Did you get that part about gin in a plastic bottle?

As for the harvest? We're halfway there. We have a good 25-30 lbs. of Metechi and California Early White drying away in the garage -- with a similar amount still sitting in the ground -- located in an adjacent planter bed.

What in the world are we going to do with all that garlic? Well -- there is a plus side in this in that it really does irritate the neighbors to no end. The stench also keeps their dog from doing "his business" on my small stretch of front lawn -- so if there's a plus to this -- there it is.

Venus and I will use much of the harvest garlic for home-canned pickles and Roasted Garlic and Heirloom Tomato Salsa -- which also serves a dual purpose as a degreaser (not really). Hot garlic should hopefully equal hot salsa. That is our hope.

As for the rest of the harvest? That will take place this weekend. At which point -- I can invite my curious neighbors to "Smell Me."

EDITOR'S NOTE: Despite his statements to the contrary -- Bill and Venus are blessed with the best neighbors that any North Natomas homeowner could ever ask for. It's the neighbors who are actually very unlucky.