 |
| PVC Support Cages-Bird Back 40 |
Eye popping. Astounding. Scary.
No -- I am not referring to the size of my stomach. Though that does need some work -- and is monsterish in a monster sort of way -- the monsters I am referring to are pictured to the right. This scary mass of growth is the Bird 2011 heirloom tomato garden barely five weeks after plant out.
Yes -- those are the famous Thomas Matkey PVC cages that have now been installed. This is just the first tier. The second tier will come in another few weeks. Setting this up -- this year at least -- was no easy task. The cages in front of you took the better part of two days to install.
And they are not installed as well as I would like.
 |
| Assembled Matkey PVC Cage Tier |
In a "normal" tomato year (what year is really normal?) -- I lay the first tier construction over the plant -- mark off the holes with stakes -- remove the tier and pound PVC supports into the ground where the stakes have been placed. This usually makes for a fairly good fit -- although it never is quite "perfect." But -- PVC is forgiving. It bends. So -- if a post isn't exactly straight? You can bend it somewhat to where the first tier assembly will snap right on with no problems whatsoever.
But -- again -- this is a "normal" tomato year. This year has not been "normal" by any stretch of the imagination. Rain and hail have wiped out a couple of weekends that would normally be reserved for gardening purposes. Family issues -- such as cleaning out the house of my dear, departed father-in-law -- have claimed another couple of gardening days.
 |
| Lush 2011 Heirloom Tomato Garden |
And so -- when I finally did find the time to start assembling the PVC supports -- I discovered (much to my chagrin) that every single plant had grown far to large and far to lush for me to place a tier assembly over the top of said plant. Any attempt to fit that square peg into a round hole resulted in (HORRORS!) broken branches -- bruised stems -- torn leaves -- blossoms knocked to the ground and early season production pounded into the ground.
Instead -- I was forced to adopt a tactic that I employed some two years ago when I again waited far too long to put the PVC cages on.
This little installation trick involves putting the entire cage together first -- attaching four 30-inch vertical supports to the assembled first tier (pictured above) -- and then hammering it into the ground from above. This is difficult as you need to drive all four PVC supports in at the same time -- all at the same level. One wrong "THWACK" with the rubber hammer can (and did) cause the assembled tier to suddenly break apart.
 |
| Pound! But Don't Break! |
Extra care and attention must also be given to the entry points for each 30-inch PVC vertical. The tomato plants had grown so large and lush that many had grown right into one another. We don't want to be pounding stakes through branches, now do we? We also don't want to drive stakes through the drip irrigation sprinklers that are now buried under massive, lush tomato leaves and branches.
Dear neighbors: If you were wondering why I was using a flashlight to peer into tomato plants during the light of day -- now you know the reason why. It wasn't a sudden fit of insanity -- though that probably isn't far off.
 |
| Early Season Production: Green Zebra |
And now? A bit of good news! All 24 PVC cages are now assembled and hammered into place. Despite the crummy May weather -- the rain and hail hasn't stunted growth nor has it led to the onset of disease (which is always possible when you're cramming tomato plants into a small space). Most plants are now three feet tall, with the exception of the Marianna's Peace, which is closer to four.
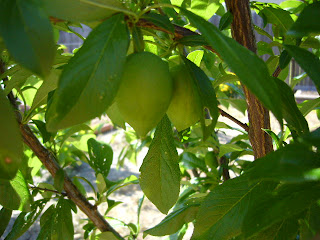
Installing PVC cages from above also means a close inspection of each plant, which revealed quite a bit of early season production. Nearly every plant has set at least two or three early season tomatoes. The early producers like Bloody Butcher, Tigerella, Stupice and Early Girl have set decidedly more.
The monsters are growing. Beware.
And now -- to answer a few questions:
How much to these PVC Cages Cost? Each cage costs $7 to $10. The most expensive pieces -- the PVC Cross -- sell for $1 each. Each cage requires four crosses. The top tier is constructed with PVC T's -- which are decidedly cheaper.
How strong are PVC Cages? I've never lost a single one. They hold up to strong winds, heavy crops, marauding cats, whatever Mother Nature can throw at them.
Are the PVC pieces glued together? No -- otherwise I'd never get them apart. They hold together quite well without glue.
How many years have you used this design? This is the fourth year of use for these cages. Not one piece has ever broken or so much as cracked.
What is the biggest drawback? If there is a drawback -- it's the time involved. Each piece must be cut to size. Putting each cage together also takes time.
How do you build these cages? Step-by-step instructions, with photos, can be found here.


